
I started baking the orange cake as a hobby a decade ago, eventually becoming a favorite item on the menu in our restaurant.
I am happy to share how to make my delightful orange cakes, derived from the pound cake, with only pure orange juice and zest. It is a no-frills recipe emphasizing the technique and the formulation. This simple recipe is packed with an irresistible flavor and guarantees a total indulgence of the taste buds.
You will expect to read a long article because I want to explain the recipe in detail. Please read before attempting the recipe. Most of the information is in the text, not the abbreviated recipe.
Note: This post may contain affiliate links. Please read my privacy policy for more info. I may receive commissions for purchases made through links in this post. As an Amazon Associate, I earn from qualifying purchases.

Part 1- The ingredients
a. Butter
The first step in making this orange butter cake is to remove the butter from the refrigerator. Do this first because it takes time for the butter to soften because only soft butter can form good buttercream.
- Cut 300g of butter into small pieces to let it soften in the mixing bowl.
- Always start with this step to let the butter soften before beginning the creaming process. I do not cut the butter into small pieces. By the time I get the rest of the ingredients ready, the butter has already fully softened.
- Through my experience, I found out that only soft butter can produce the fluffiest buttercream, which can trap more air in the sugar/butter mixture to create the lightest possible orange cake.
b. Sugar
- Castor sugar is ideal as it is fine enough to dissolve quickly to form a light, fluffy, homogenous cream.
- You can also use granulated sugar, slightly bigger granules. Mix the sugar and butter longer to get a similar fluffy result.
c. Eggs
- I want to clarify the amount of egg as mentioned in the recipe. Eggs are graded according to their size. Therefore, it is best to mention the exact weight of the egg in the recipe instead of how many eggs are used.
- The eggs I get from my vendor are about 50g each, excludes the shell. Our kitchen staffs are so used to digital scales that we measure everything with them, including liquids like water, milk, and eggs.
- I strongly suggest you get a digital weighing scale with accuracy down to one gram. I speak from my experience working in the restaurant for over a decade. It helps to standardize all the recipes and take everyone out of the guesswork of how much exactly a cup, a tablespoon, etc.
d. Orange zest

- There is so much flavor in the orange zest (orange rind) that it is a waste if you do not include it in the cake.
- I will use the zest from all the oranges for the cake. That means it is more convenient to zest the oranges before juicing them.
- The orange zest should be finely minced. Run the chef knife over the zest to mince it to ensure no large pieces are present. This process takes some extra time, but I think it is worth it. I believe that none of my customers like to chew on large pieces of orange peel. So far, I have not encountered any negative feedback regarding this after so many years.
e. Orange juice

- I use fresh oranges to get the juice. The orange syrup is not an option.
- I used 80g of orange juice per cake a few years ago but increased it to 95g this year to produce a moist cake without affecting the stability and texture.
- Sometimes there will be some pulp in the juice, which is calculated as part of the amount I want.
- I do not use vanilla extract because I intend to highlight the cake’s fresh orange flavor.
f. Almond nibs
- Adding almond nibs (and other ingredients) enhances the taste and is the garnish for the orange cake.
- I add about 20g of almond nibs to the batter and sprinkle another 5g on the surface. Adding almond nibs is a welcome addition to my customers. You can use other nuts for the same purpose.
g. Chocolate chips
My previous version of the orange cake is decorated with chocolate chips on the surface. You can purchase the ready-made chips or prepare your own.
- Put the block of chocolate in the refrigerator until it hardens. Cut the chocolate with a sharp knife into thin slices, then turn ninety degrees and cut them into cubes. Since the hardened chocolate is brittle, it will shatter into small chips during the second cut.
h. Flour
I use plain cake flour, which contains about eight percent of gluten. If you use self-raising flour, check the content clearly, as it includes a certain percentage of baking powder. If you do, you must omit the recipe’s baking powder.
i. Salt
I prefer to add 1% of salt to the plain cake flour. That means if I use 100g of flour, I will add 1g of salt. Please ensure you are using unsalted butter, or you will end up with an orange cake that is too salty.
j. Baking powder
- The standard baking powder is between 1% and 4% of the flour. Most people will sense the weird taste of baking powder and a feeling of roughness on the tongue if it exceeds this amount. I am quite sensitive to baking powder and can taste it even if it is around 3%. That is why I only use 2%, with a satisfactory result.
- The cake will still rise properly even without adding baking powder if butter and sugar are creamed correctly.
- I will not use baking powder for a basic pound cake. Nevertheless, the presence of orange juice will cause the battle runnier, and baking powder is handy to ensure the cake rises properly. Do not use baking powder if you are using self-raising flour.

Part 2- Breaking down the process of making an orange cake in detail
a. Measure the amount of each ingredient
- Measure the quantity of butter, cut it into large chunks and leave it in the mixing bowl for at least half an hour. I live in a tropical country with room temperature close to 30°C throughout the year. You may need to wait longer in the cold season before the butter turns soft.
- Once the butter is soft, add the castor sugar and start the mixing process. The optimum amount of sugar should be between 80% and 120% of the flour weight. A higher amount of sugar will result in a more tender cake. (Sugar is the tenderer for cake). I finally settled the amount of sugar at 80%, as most customers prefer a less sweet version.
- Some of my customers still think it is too sweet, but I politely decline to reduce it further because the orange cake will lose its tenderness.
b. The most critical step- mixing
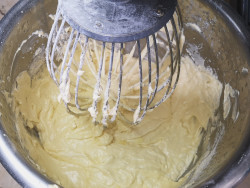
Mixing is the most critical step, which I will elaborate in detail.
- When to start mixing. The best time to start mixing is when the butter is sufficiently softened. If the butter is too cold, it will trap less air within the butter/sugar mixture. Soft butter can trap more air and form a very fluffy cream. The air will expand in the oven and push the cake upward to create an adequately raised cake.
- The duration of mixing. Mix the butter and sugar until there are no visible changes to the degree of fluffiness. The endpoint should be light, creamy, and looks like slightly softened ice cream.
- The time to reach this point depends on the speed and the mixing attachment shape and the butter and sugar volume. When I make four cakes (i.e., 4x of the recipe below) with a large bowl, it takes at least five minutes to reach a state where there is no visible increase in the fluffiness of the cream.
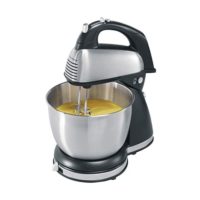
- The mixing attachments. The wire whisk is the most suitable mixing attachment for the creaming process. (My mixer comes with a wire whisk (for cake), the blade (for making the pie), and the dough hook (for making bread). Some smaller mixers may not provide the wire whisk attachment. In that case, you have to use whatever is available. You will need a longer time to achieve the same degree of fluffiness.
- The mixing speed. I mix the sugar and butter at low speed because some blocks of butter may still not fully soften. High speed may exert too much force on the mixer blade at this stage.
- Once the sugar is partially mixed with the butter, turn to high speed as it yields a better result.
c. Adding eggs
- Add the egg only after the butter/sugar has turned into a fluffy cream.
- If you have a powerful mixer, pour all the eggs into the cream, and continue mixing at high speed. If your mixer a less powerful, divide the egg liquid into two or three portions. Pour the first portion into the cream and mix until there are no noticeable strands of eggs. Continue adding the remaining parts.
d. Add the orange juice
- Add the orange juice and continue mixing it until homogenous.
- Making the orange cake is quite simple. All you need is to keep mixing and mixing, but pay attention to the batter’s visual appearance and fluffiness. That is the key to getting the perfect result.
- You need to mix it until homogeneous before proceeding to the next step. It may take three to four minutes, depending on the mixer’s speed and the batter’s volume. If you are unsure, mix for an additional four or five minutes. There is no harm in doing so.
e. Adding the dry ingredients
The batter is a bit runny now, becoming thicker once you add the flour mixture (flour. salt, and baking powder).
- Make sure the speed is switched to low with the paddle attachment, as rapid mixing will create gluten in the batter, which will toughen the cake.
- Prolonged mixing creates gluten. That is why if you knead the bread dough for at least eight to ten minutes, it will turn into a springy, elastic ball. I have a Japanese milk bread recipe with a light and cottony texture if you want to make bread.
- Some people want to minimize the formation of gluten by hand mixing the flour into the batter. I find that using your mixer’s lowest speed is also working well. The endpoint of mixing is when all the flour has been incorporated into the batter, NOT longer than that. This step minimizes the gluten formation and the potential outcome of turning it into an elastic mass. It may only take one minute, or less, depending on the volume of your batter and the size of the mixing attachments.
- It is also when you need to add salt and baking powder. Most of the baking powder nowadays is double-acting. However, I found that it will lose its leavening power if you set aside the batter for more than an hour.
f. Mixing in the almond nibs and orange zest
Add the almond nibs right before panning. Give it a few stirs. Do not overmix the dough.
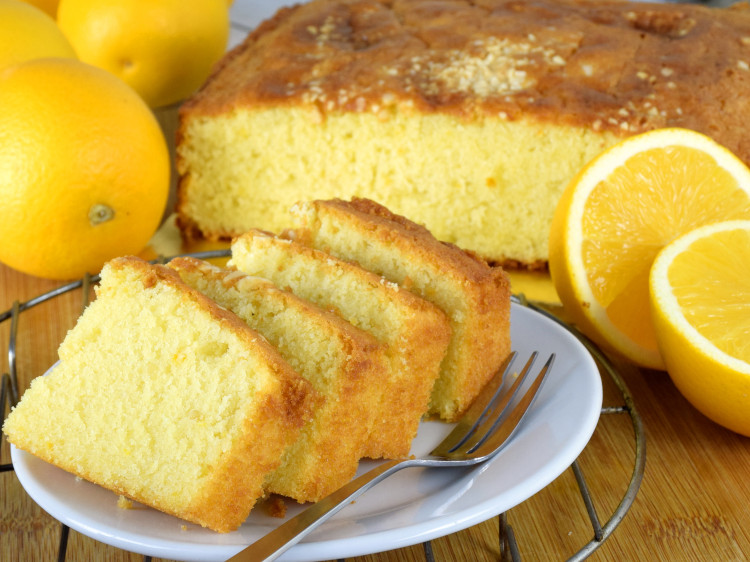
Part 3- Baking
I mentioned earlier that mixing is a crucial factor for a perfect cake. It is difficult to quantify, as every mixer behaves differently.
Similarly, baking is the next important factor. I have spent more time investigating the behavior of my oven than my mixer. (Imagine I have two identical ovens, and the actual temperature is not the same!)
a. The temperature and duration
- So I have to make peace with my oven and acknowledge that each of them behaves differently, even if they are the same modal.
- That also means it is impossible to guarantee to bake successfully by following the temperature and timing mentioned in any recipe. This uncertainty happens because you are using your oven at home, and the recipe creators use theirs.
- You can start testing by baking in a preheated oven, 175°C/350°F top and bottom temperature for 50-55 minutes. After that, you can make some adjustments to get the best result.
- If you are lucky, you may get it correct the first time. If not, you may need several rounds of testing until you understand the behavior of your oven. The cake is cooked when you insert a wooden skewer into the center of the cake, and it comes out clean.
b. Size and type of cake pan
- I use 8×8 inches square pan for this orange cake recipe. You can also use a loaf pan or an 8-inches diameter round pan, but the height of the cake will increase by 20%.
- Through my observation, butter-rich cake tends to crack at the top of the cake. (You will find many crack top pound cakes on the internet). The cake tends to crack at the center when I use a round tin. I do not have the scientific answer, but the crack never happens once I change to the square from round cake tins.
c. Lining the cake tin
What happens if the cake gets stuck to the bottom of the cake tin after baking?
- You can avoid this frustrating moment by placing an oiled baking paper in the cake tin before pouring the batter into the tin.
- There is no need to line the sides as the cake will shrink and detach from the sides.
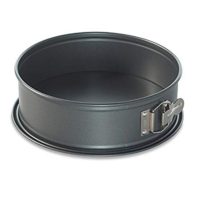
- The best cake tins are those with detachable bottom or springboard cake tins.
d. Remove the cake from the cake tin.
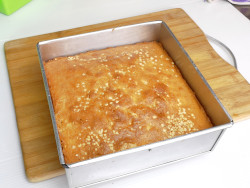
- Remove the cake from the oven. Let it rest at room temperature for at least five to ten minutes.
- It will shrink just a little and detach from the side. You do NOT need to run a knife between the sides and the cake. If you use a cake tin with a detachable base, invert the cake on a cake board, give the cake a gentle push, and it will fall out from the cake tin with the base. Remove the base and invert that cake again onto another cake board, or cool on a wire rack. You can use a springform pan with a detachable base, making removing the cake easier.
Conclusion
This article explains how I make the orange cake in detail. It may not be the ‘textbook’ method, but that is based on years of testing and adjusting. It is actionable and yields results. This is the basis of how to make the basic cake, and how to dress up the cake with frosting and decoration is only limited by your imagination.
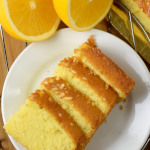
Orange Cake Recipe
I am happy to share with you how to make my delightful orange cakes, which sells. This recipe is a derivation of the pound cake, make with only pure orange juice and zests. It is a no-frills recipe, emphasize on the technique, the formulation.
Ingredients
- 300 g butter, unsalted
- 240 g castor sugar
- 300 g eggs, weight exclude shell
- 300 g plain flour
- 3 g salt
- 6 g baking powder
- 25 g almond nibs
- 95 ml orange juice
- orange zest, from 1 oranges
Instructions
- Zest the orange. Finely chop the orange zest.
- Ge ready the orange juice.
- Cut the unsalted butter into large pieces. Keep in the mixing bowl until it turns soft.
- Add the sugar into the mixer, start creaming the butter and sugar at high speed until it becomes fluffy and light.
- Add the egg and orange juice. Continue mixing until homogenous.
- Change the mixing speed to low. Add the salt, baking powder and flour. Mix for one minute.
- Add the orange zest and 2/3 of the almond nibs.
- Scrape down the flour from the side of the mixing bowl. Continue mixing for another one minute.
- Remove the mixing bowl from the machine. Hand mixes it once again for the final round.
- Place an oiled baking paper in the cake tin with a detachable base before pouring the batter into the tin.
- Smoothen the batter with a spatula. Sprinkle the remaining almond on top.
- Tap the cake on the working surface to remove any bubbles, if any.
- Bake at 175°C/350°F top and bottom temperature for 60 minutes.
- Remove the cake from the oven.
- Invert the cake on a cake board, give the cake a gentle push, and it will fall out from the cake tin together with the base. Remove the base and invert that cake again onto another cake board.
Recommended Products
As an Amazon Associate and member of other affiliate programs, I earn from qualifying purchases.


Nutrition Information:
Yield: 9 Serving Size: cut to nine piecesAmount Per Serving: Calories: 560Total Fat: 32gSaturated Fat: 18gTrans Fat: 0gUnsaturated Fat: 12gCholesterol: 196mgSodium: 266mgCarbohydrates: 60gFiber: 2gSugar: 29gProtein: 9g
This data was provided and calculated by Nutritionix on 4/1/2019
Hi KP
If I used other brand of all purpose flour or cake flour for the orange cake. Does this affect the outcome of the cake. Thanks serene
Hi Serene,
This orange cake recipe is not brand specific. You can use any brand of all-purpose flour or cake flour. The only exception is self-raising flour. Self-raising flour contains baking powder, so you need to omit the baking powder in the recipe.
KP Kwan
Hi KP Kwan,
Thank you for the clear details .
Can advise I did follow the step and recipe given above. However my cake seem dry and less orange test.
Can advise are my mixing method having issue? Thank you
Hi Lim,
I do not think it is the mixing method that causes dryness. The cake’s liquid is already quite a lot (300g egg plus 95 ml juice). So I would try to increase the temperature slightly and bake slightly shorter to make it less dry.
I would suggest adding more orange zest for the orange taste. (zest has more flavor than juice).
I hope this helps 🙂
KP Kwan
This orange cake has the most amazing texture! Looks perfect!
I am glad you like this orange cake, Natalie 🙂
How do I get your orange cake recipe?
The orange cake recipe is on this page. Please scroll down just past the embedded video, and you will find it. You can print it out too.
hello, i’ll try it. seems so god. tk.
tina
Hi Tina,
Glad to know you like this orange cake recipe. I hope it works well.
KP Kwan
Hi, this is KP Kwan. I am happy to see you in this comment area, as you have read through my recipe. I am glad to reply to any questions and comments as soon as possible.
Hello KP,
Thanks heaps for your very detailed instructions – very helpful indeed. Why use unsalted butter to then add salt.
If my oven’s temperature is a bit high, would this make the cake fluffier, bearing in mind that the baking tine will be less?
Are you able to please remove the social media icons from the right side of your website as these make it hard and a bit annoying to read through your instructions
Well done to you for sharing your knowledge with the World!
Hi Patricia,
Thanks for reading my article.
1. I use unsalted butter because I am working in the restaurant. The butter is used for different food items, and some may need more (or less) salt. This way I can control the amount salt easily in various recipes.
2. I do not think it will make it fluffier if you increase the temperature. If you want a fluffier cake, you can try to improve the amount of baking powder, and ensure the butter/sugar mixture is beaten until VERY flurry before proceeding to the next step.
I will look into the social sharing button. I think it may be an issue for the mobile phone but should be fine on IPad and desktop.
Thanks so much,
KP Kwan
Thanks for your prompt response, KP.
Do you increase/decrease the baking time according to the size of the cake? If so, by how long? ie if I halve or triple the ingredients, for how long should I bake the cake?
Thanks again,
Hi Patricia,
Reduce the baking time to 40 to 50 minutes for a smaller cake, with the same temperature.
Increase the baking time to 70 minutes for a bigger cake, with a slightly lower temperature. (5-10 degrees Celcius lower). Lower temperature to ensure the surface will not brown too much with a longer time.
If you are unsure, open the door of the oven to have a quick peep of the color 10 minutes before the actual baking time. Then decide how much extra time depends on the color.
Thanks,
KP Kwan
Can i use margarine instead of using butter? Does it effect my cake?
You can substitute butter with margarine with the same amount. The taste will be affected as butter as a stronger aroma.