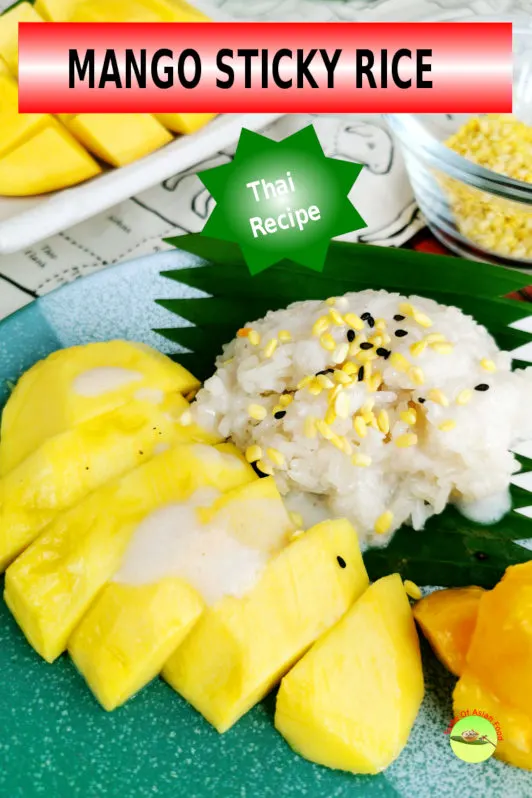
Mango sticky rice (khao neow mamuang / ข้าวเหนียวมะม่วง) is an amazing and authentic Thai dessert. It is typical street food in Thailand, especially during summer, when mango is in season. This dessert is also popular in other South East Asia countries, including my hometown, Malaysia.
Mango sticky rice is hugely popular in the Thai restaurants in Malaysia, mainly owned by the Thai’s who come from Thailand sharing the border of Malaysia.
In this article, I would like to present to you my version of mango sticky rice. It may not be 100% authentic as I’m not of Thai origin, but it tastes exactly like those serving in Thai restaurants operating in Kuala Lumpur.
I am also lucky that Thai mango is always available throughout the year. Besides, freshly pressed coconut milk can be purchased from any wet market near me.
Let’s get into the details of how to prepare mango sticky rice.
Note: This post may contain affiliate links. Please read my privacy policy for more info. I may receive commissions for purchases made through links in this post. As an Amazon Associate, I earn from qualifying purchases.
1. Steam the sticky (glutinous) rice
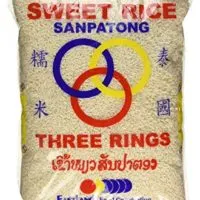
Sticky rice is also called glutinous rice or sweet rice. It is shorter and rounder than long grain rice and is generally available in all the grocery shops in Asia. If you are living outside Asia, you should be able to purchase it in any Asian grocery shops.
Here are the steps:
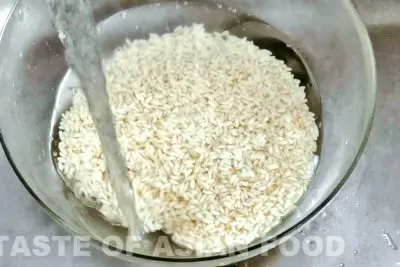
- Wash the sticky rice in several changes of water until it runs clear. This step is vital to remove as much starch as possible from the glutinous rice grains. If you do not remove the excess starch, it will gel up the coconut milk added to the rice in the next step. The rice will become mushy and gummy. That is not something that is intended to.
- From my experience, you need to rinse the rice with water about 5 to 6 times before the water runs clear.
- After washing away the excess starch, soak the rice in water for a few hours (or overnight if time is permissible). The rice will absorb the water, which makes it soft and tender after cooking.
- Drain the rice with a wire mesh strainer and cook without adding water. The water absorbed by the sticky rice is sufficient to cook the rice. Too much water will turn the rice to become a gooey mass.
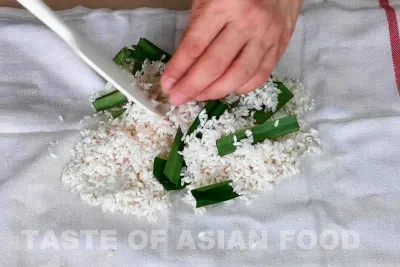
- Transfer the rice to a large piece of cloth. Wrap the rice and place it in the steaming tray. Traditionally, the rice is placed in a special sticky rice steamer and basket and steam over a pot of water. In practice, you can use any kitchen equipment to achieve the same purpose.
- Cover the steamer and reduce the heat to low. Steam the glutinous rice for about 25 minutes or until it is tender and translucent. You can open the cover to check the doneness, and steam a little longer if necessary.
- Once the rice is done, remove the cloth with the rice from the steamer. Transfer the rice to a large mixing bowl.
Optional step
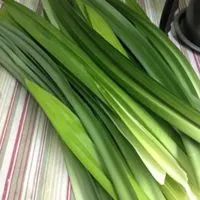
You can steam the rice with some pandan leaves (screw pine leaves). These leaves are easily available in Thailand and Malaysia. They have a subtle aroma and flavor, extensively used to cook a variety of rice dishes and desserts. If you manage to get it, cut the leaves into short sections, and insert them in between the wet rice to steam. It adds a subtle aroma to the rice.
2. Prepare the sweet coconut milk
The freshly cooked sticky rice still able to absorb more liquid since it is steamed without adding water. Now we want to season the rice with sweetened coconut milk.
Here are the steps to prepare coconut milk:
- Heat the coconut milk gently in a small pot.
- Add the sugar and salt and stir until the sugar is dissolved. When you cook this coconut syrup, do not reduce it too much because we want to maintain the volume of the syrup. The flavor should also be mildly sweet to have a flavor contrast to the sauce for topping that we make in the next step.
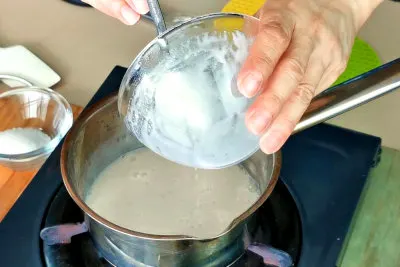
- Once the sugar is dissolved, remove from heat. Add it to the sticky rice while it is still warm.
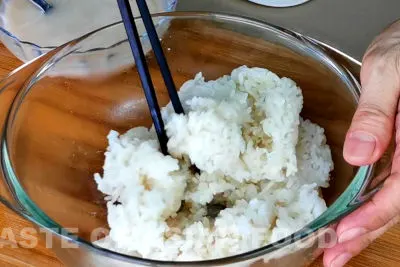
- Add the warm coconut milk gradually to the glutinous rice in the mixing bowl. The coconut milk and the rice must be hot to ensure the coconut milk absorbs thoroughly. Do not vigorously stir it as it will break the grains.
- Let the coconut milk macerate the rice until the glutinous rice fully absorbs the coconut milk. Let it stand for 30 minutes before serving.
- Cover the rice if you do not consume it immediately because it can dry out and become crusty.
Note: It is best to use fresh coconut milk. However, it may not be available in certain places. If this is the case, you should use the full-fat coconut cream, not the light coconut milk. The coconut cream should contain about 20 to 25% of coconut fat.
3. Make the coconut sauce as a topping
Now let’s make the coconut sauce to drizzle on the rice as the topping.
- Combine the cornstarch with some water to form a slurry.
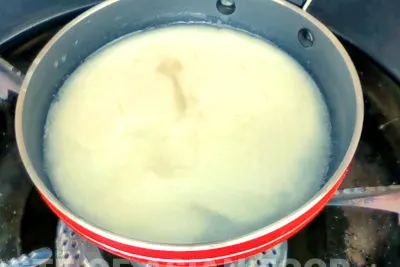
- Add the coconut milk, salt, and the starch slurry in a small pan. Heat it slowly until it thickens.
- Keep it aside to let it cools
4. Use the ripe mangoes
The attraction of the mango sticky rice is attributed to the contrast between the refreshing mango and the sticky and milky rice texture. You need mangoes that are ripe, smooth, and sweet. Look for the mangoes with a golden color and slightly soft when touch. These are the mangoes that are juicy and sweet.
There are two ways to cut the mangoes for the sticky rice.
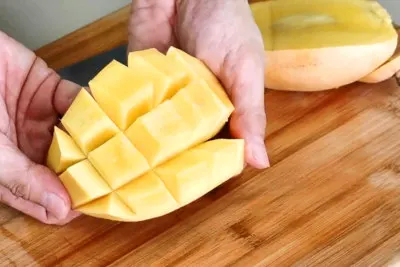
Cut into cubes
- Trim a thin slice off the bottom so that the mango can stand up without falling over.
- Take a knife just off-center and cut parallel straight down the cheek of the mango ( that is the flat part with the most flesh). Try not to hit the pit. If you feel something hard along the way, you may have hit the pit. Just come back up and cut again.
- Put the mango cheek skin side down and create a grid. Apply just enough pressure to the knife to cut but not through the skin. Create the grid by making lines in one direction, then rotate 90 degrees and cut them in the perpendicular direction.
- Flip the mango inside out, and all the mango cubes will be separated.
Cut into slices
- Another method is to peel the mango with your knife before cutting out the cheek. Then cut the mango flesh into slices.
5. Toast the mung beans
This step is optional. Toasted mung beans are crunchy, which provide a welcoming contrast against the soft and fluffy sticky rice. It is usually sprinkled on top of the sticky rice right before serving. Another option is to use toasted sesame seeds or crushed roasted peanuts instead of using mung beans.
- Rinse the mung beans in cold water.
- Add the beans to a small pot and fill with cold water enough to cover them.
- Bring it to a boil over low heat, then continue simmer for two to three minutes.
- Remove it from heat and let it cool.
- Wash the beans gently with cold water to remove the starch. This step will prevent the beans from sticking to the pan later.
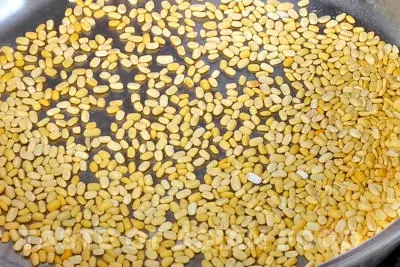
- Toast the mung beans in a pan over low heat until they start popping around the pan.
- Continue toasting and flipping until the mung beans become crunchy and golden.
- Remove from heat and let it cool down before use.
6. To assemble and serve
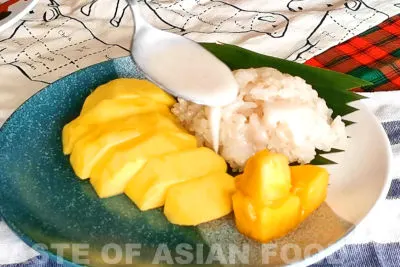
- Cut a piece of banana leaf and put it on a dessert plate.
- Mold the sticky rice with a bowl. Please rise on the banana leaf. Alternatively, you can just pile up the sticky rice on the plate.
- Drizzle the coconut sauce on the sticky rice. Serve the extra sauce alongside along with the mango and sticky rice.
- Garnish with some toasted mung beans. Serve.
Other related recipes
You may also want to try other similar Asian desserts. If you like mango, the Chinese style mango pudding will surely be your favorite. If you like beans, this red bean soup is a popular Chinese dessert among the Cantonese.
You can also use the mung bean and glutinous rice to prepare Zongzi, the famous dumpling for celebrating the dragon boat festival. Mung bean is also the main ingredient for making dhal cooked by slowly boiling the mung bean with a myriad of Indian herbs.
Mango Sticky Rice
Mango sticky rice is an amazing and authentic Thai dessert. It is typical street food in Thailand, especially during summer, when mango is in season. This dessert is also popular in other South East Asia countries, including my hometown, Malaysia.
Ingredients
The sticky rice (A)
- 200g sticky rice
- 160g fresh coconut cream
- 30g sugar
- 1/4 tsp salt
- 2 pandan leaves
The coconut cream topping (B)
- 40ml coconut cream
- A pinch of salt
- 1/4 tsp cornstarch (mixed with 1 tbsp of water)
Others (C)
- Sweet Thai mango
- 20g mung beans
Instructions
The rice
- Wash the sticky rice in several changes of water until it runs clear. Soak the rice in water for a few hours (or overnight if time is permissible).
- Wrap the rice and pandan leaves with cloth and steam for about 25 minutes.
- Bring the coconut milk to a boil over low heat in a small pot. Add the sugar and salt and stir until the sugar is dissolved. Remove from heat.
- Transfer the rice to a large mixing bowl. Add the warm coconut milk gradually to the glutinous rice in the mixing bowl. Let it stand for 30 minutes before serving.
The sauce
- Dissolve the cornstarch with some water. Heat the coconut milk and salt in a small pot. Add the cornstarch slurry and stir until it thickens.
To serve
- Toast the mung beans in a pan over low heat until they become crunchy.
- Cut the mango.
- Place the sticky rice on the plate. Drizzle the coconut sauce on the sticky rice. Garnish with some toasted mung beans and serve with the chilled mango pieces.
Recommended Products
As an Amazon Associate and member of other affiliate programs, I earn from qualifying purchases.
Nutrition Information:
Yield: 4 Serving Size: 1Amount Per Serving: Calories: 345Total Fat: 18gSaturated Fat: 15gTrans Fat: 0gUnsaturated Fat: 2gCholesterol: 5mgSodium: 304mgCarbohydrates: 45gFiber: 5gSugar: 23gProtein: 6g
This data was provided and calculated by Nutritionix on 5/22/2020



Paul
Wednesday 22nd of July 2020
Nicely done! I especially appreciate the description of toasting mung beans and your pointer to some good ones. Suggestion: please make this easier to print. I tried to print it and it did not come out well.
KP Kwan
Thursday 23rd of July 2020
Thanks Paul. Will look at the printing problem.
Elsa Lock
Monday 1st of June 2020
Yummy ! Thanks KP Kwan.
Elsa
KP Kwan
Monday 1st of June 2020
You are welcome, Elsa.
KP Kwan
Monday 25th of May 2020
Hi, this is KP Kwan. I am happy to see you in this comment area, as you have read through my recipe. I am pleased to reply to any questions and comments as soon as possible.