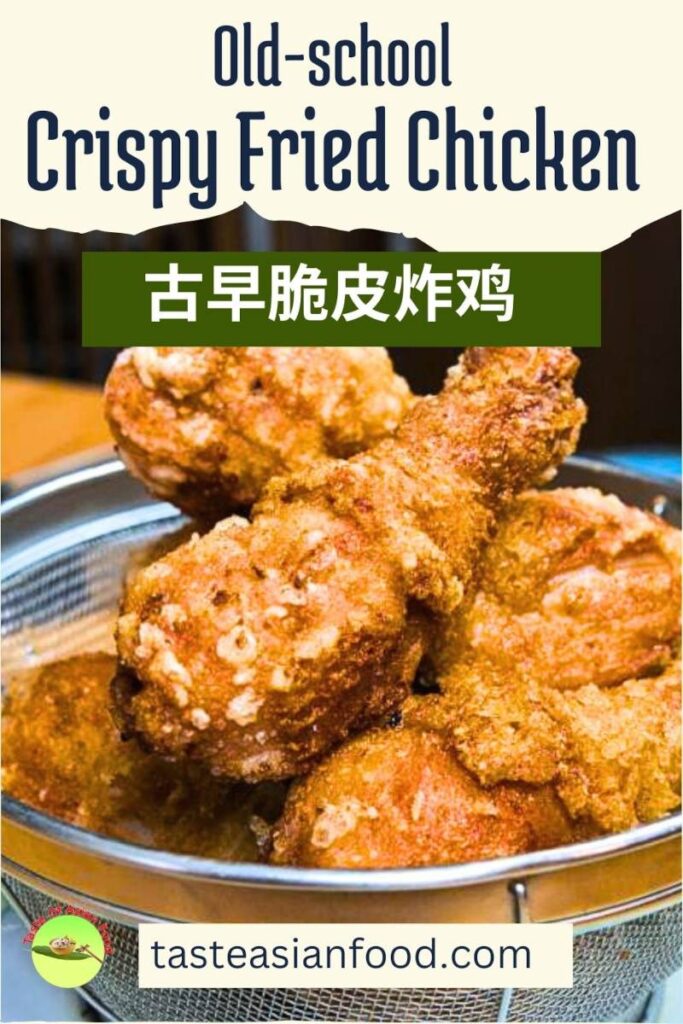
Mother-in-law’s Crispy Fried Chicken
There is something truly magical about a recipe that has traveled through decades. My mother-in-law is 95 this year, and for as long as our family can remember, her old-school fried chicken was the centerpiece of every gathering. It’s a taste that lingers in our collective memory. Now that it’s our turn to take over the kitchen, I feel a deep responsibility to reignite those memories and recreate that long-lost nostalgic flavor.
While I stayed faithful to her classic marinade, I have added a little twist to the process. By treating the chicken with a quick baking soda soak before seasoning, the skin is even crispier than the original. I’m so happy to share this piece of our family recipe with you today.

Note: This post may contain affiliate links. Please read my privacy policy for more info. I may receive commissions for purchases made through links in this post. As an Amazon Associate, I earn from qualifying purchases.
The Main Ingredients
Below is a list of ingredients used in my mother-in-law’s recipe, with the addition of baking soda and vinegar for extra crispiness. She only uses simple ingredients that are readily available in the kitchen.
- Chicken Drumsticks: This is what my mother-in-law used because the bone keeps the meat incredibly juicy while the skin provides the perfect canvas for our crispy treatment. Of course, you can use a whole chicken or any other parts, such as chicken wings.
- Baking Soda: Our “secret weapon” that breaks down the skin’s proteins and surface fat, allowing it to become paper-thin and crisp once it hits the oil.
- Chinkiang Vinegar: This dark, malty Chinese vinegar is used to neutralize the baking soda, removing any metallic taste.
- Fresh Ginger Juice: This is her secret ingredient. It provides a sharp, refreshing flavor that permeates the fried skin.
- Light Soy Sauce: Add a touch of umami and saltiness without darkening the chicken too much, and keeping that golden-fried look.
- White Pepper: Crucial for that authentic “old-school” Chinese flavor.
- Shaoxing Wine: Adds a traditional aromatic depth that makes the chicken smell like a classic Cantonese dish.
- Potato Starch: It creates a thin layer on the skin, absorbs the excess moisture, and forms a crisp, thin crust. Cornstarch is another good alternative.
How to Prepare and Cook
Below is a detailed step-by-step guide on how to prepare the chicken. I’ve broken it down into subsections for clarity. The steps in the recipe card below are an abbreviated version.
1. Soak the chicken in baking soda
Baking soda makes the skin crispier and helps it brown better. This is the only step I added to my mother-in-law’s original recipe.
How
- Clean the chicken drumsticks thoroughly and place them in a large mixing bowl or pot. Add enough water to fully submerge them, then add the baking soda and stir well. Let the baking soda work for 15 to 20 minutes.
- After that, add vinegar to neutralize the baking soda to avoid leaving a metallic taste caused by excess baking soda. Wash thoroughly. Drain the chicken in a colander, then pat dry with kitchen towels.
How baking soda works
- First, baking soda breaks down part of the fat under the skin, which will be washed away, making the skin thinner. You will notice that the skin becomes partially translucent. The result: thinner skin becomes crispier after frying.
- Second, it untangles the protein strands in the collagen of the skin, making it more porous. When you fry the chicken, the air trapped in the skin expands and creates tiny blistered bubbles. As the chicken hits the oil, moisture can escape rapidly, resulting in very crispy skin.
- Lastly, baking soda makes the skin more alkaline, which speeds up the reaction between the amino acids in the protein and the sugar at a lower frying temperature. Because this reaction happens at a lower temperature, browning also occurs much faster.
2. Marinate the Chicken
Now add the ginger juice, light soy sauce, salt, sugar, ground white pepper, potato starch, and Shaoxing wine to the chicken. Massage these ingredients into the chicken thoroughly, then let it marinate for a few hours before frying.
The small amount of starch helps bind the liquid ingredients in the marinade to the chicken more effectively. At a later stage, we will coat the chicken again with potato starch before deep frying to create a thin layer that helps crisp up the skin.
An easy way to make ginger juice is to lightly bash the ginger, finely chop it, then place it into a cloth bag or wrap it in a piece of cheesecloth and squeeze out the juice. Ginger juice is the most important ingredient in my mother-in-law’s recipe, and I highly recommend using fresh ginger juice for the best flavor.
Marinate the chicken for half a day for the best results, so the flavor can fully penetrate the chicken drumsticks.
3. Coat the Chicken with Starch
Now we proceed to the actual deep frying. Before frying, prepare a bowl of potato starch to coat the chicken. Potato starch gives the best crispiness, but if you don’t have it, cornstarch is a good substitute.
Place the drumsticks into the bowl and coat them completely with the potato starch. Use your hands to lightly press the starch onto the drumstick so it sticks firmly, then shake off the excess. What we want is a thin layer of starch. If it’s too thick, it won’t be as crispy as a thin coating.
Let the coated chicken rest for about 10 to 15 minutes so the starch can absorb moisture and adhere firmly to the skin. This helps prevent excess starch from falling off into the oil and dirtying it.
4. First Fry at Lower Temperature
The drumsticks will be fried twice. For the first round, we use a lower temperature to fully cook the chicken.
Start by heating the vegetable oil with a high smoking point, such as corn oil, canola oil, or palm oil, to about 150°C/300°F. You can use a kitchen thermometer to check the oil temperature. If not, insert a wooden chopstick into the oil. When small bubbles slowly rise from the surface of the chopstick, the oil is at the right temperature.
Deep fry the drumsticks in batches until they are light golden brown and fully cooked in the center, with an internal temperature of about 75°C/167°F. This usually takes around 6 to 8 minutes, depending on the size of the drumsticks.
Remove the chicken from the hot oil and let it rest on a wire rack or a wire mesh colander. Do not place it on a paper towel, as they trap moisture and will soften the crust, making it less crispy.
Let the chicken rest for about 10 to 15 minutes to let the moisture migrate from the center to the surface.
5. Second Fry for Extra Crispiness
Heat the oil to about 190 to 200°C. If you’re using the wooden chopstick method, you’ll notice the bubbles rising much more vigorously than in the first fry.
Fry the drumsticks for the second time. The surface color will change quickly, so keep a close eye on them to avoid burning. Once the chicken goes into the oil, expect very vigorous bubbling. This stage usually takes only about 30 seconds to 1 minute.
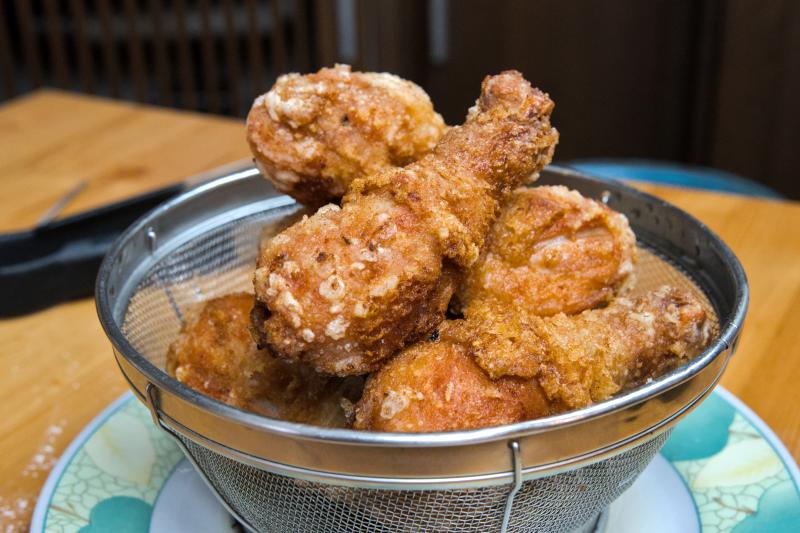
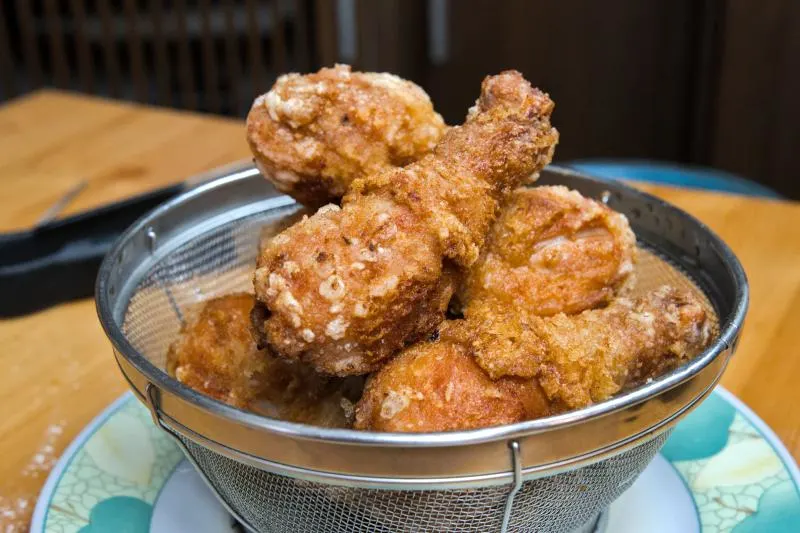
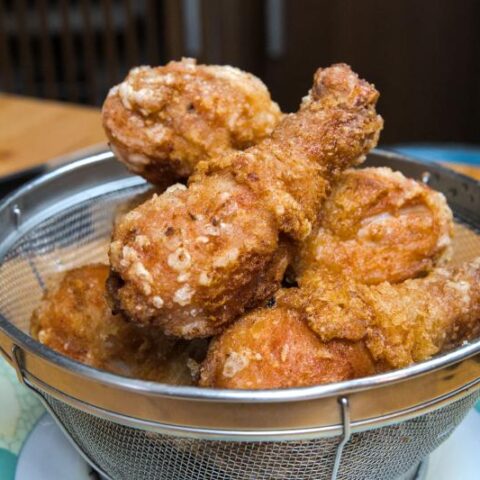
When the bubbles become smaller and the bubbling slows down, it means the surface moisture has evaporated, and the chicken is now very crispy. Immediately remove the drumsticks and let them rest again on a metal rack or wire mesh colander.
This old-school fried chicken made by my mother-in-law is incredibly crispy and stays that way for more than an hour. We all love the flavor, especially the fresh ginger taste, which really stands out. It’s a simple recipe, but one with amazing flavor and lots of nostalgia.

How to Make Extra Crispy Fried Chicken
This nostalgic ginger-infused recipe uses a unique alkaline soak to achieve a perfect, glass-like crispy texture.
Ingredients
Soak the chicken
- 1kg (2.2 lbs) chicken drumsticks
- 1 L (4.2 cups) Water
- 1/2 tbsp (7g) Baking Soda
- 2 tbsp (30ml) Chinkiang Vinegar
Marinade:
- 3 tbsp (45ml) Fresh Ginger Juice
- 1.5 tbsp (22ml) Light Soy Sauce
- 1.5 tsp (9g) Salt
- 1 tsp (2g) White Pepper
- 1 tsp (4g) Sugar
- 1 tbsp (8g) Cornstarch (to bind)
- 1 tbsp (15ml) Shaoxing Wine
Frying
- 1 cup (125g) Potato Starch
- Vegetable oil for frying
Instructions
- The Alkaline Skin Treatment. Place the drumsticks in a large bowl and submerge them in the water and baking soda solution. Stir well and let them soak for 15–20 minutes. Add the Chinkiang vinegar. Rinse the chicken thoroughly under cold running water. paper towels.
- Marinating for Flavor. Combine the dried chicken with the ginger juice, soy sauce, salt, sugar, white pepper, Shaoxing wine, and the 1 tbsp of cornstarch. Refrigerate for at least 4 hours.
- The Starch Coating. Toss the marinated drumsticks in a bowl of potato starch. Press the starch onto the skin with your hands to ensure it adheres. Shake off the excess starch. Let the coated chicken rest on a plate for 10–15 minutes.
- The First Fry. Heat oil to 150°C (300°F). Fry the drumsticks in batches for 6–8 minutes. The chicken should be fully cooked through (75°C/167°F internal). Remove and rest on a metal wire rack for 10–15 minutes.
- The Second Fry. Increase the oil heat to 190°C–200°C (375°F–390°F). Fry for only 30–60 seconds until the skin turns a deep golden brown and blisters. Rest on the wire rack again before serving.
Recommended Products
As an Amazon Associate and member of other affiliate programs, I earn from qualifying purchases.
-
 Colander Set - 2 Collapsible Colanders (Strainers) Set By Comfify - Includes 2 Folding Strainers Sizes 8" - 2 Quart and 9.5" - 3 Quart Red and Grey
 -
 Antner 5 Pairs Hardwood Chopsticks Japanese Style Reusable Hand-Carved Chopsticks Natural Wood Chop Sticks with Gift Box, Dishwasher Safe
 -

 ThermoPro TP03A Digital Instant Read Meat Thermometer Kitchen Cooking Food Candy Thermometer for Oil Deep Fry BBQ Grill Smoker Thermometer
Nutrition Information:
Yield: 9 Serving Size: 1Amount Per Serving: Calories: 319Total Fat: 10gSaturated Fat: 3gUnsaturated Fat: 8gCholesterol: 142mgSodium: 866mgCarbohydrates: 27gFiber: 2gSugar: 2gProtein: 29g
This data was provided and calculated by Nutritionix on 6/1/2026
Cook’s Notes and Useful Tips
Below are the important tips summarized for you.
- Soaking the chicken in baking soda and then neutralizing it with vinegar is an extra step I added. You can omit this step, and the chicken will still be crispy, but it will be slightly less crispy, and the crispiness may not last as long compared to when you include this step.
- It’s essential to pat the chicken dry before marinating. If the chicken is too wet, the ginger juice flavor will be diluted.
- The potato starch coating before deep frying must be thin enough. Ideally, after about 10 minutes of resting, you should almost be able to see the chicken skin through the starch. If the coating is too thick, it will form a heavy crust, and you won’t get that light, glass-shattering crispy texture.
Storage and Reheating
We never get the chance to keep any leftovers. Everything is usually gone while the chicken is still crispy and fresh from the wok. But in the unlikely event that there are leftovers, here’s what you can do.
- In the Refrigerator: Store leftovers in an airtight container for up to 2 days.
- In the Freezer: You can freeze the fried chicken for up to 1 month, though the texture is best when fresh.
- Reheating: To bring back the crunch, use an air fryer (or oven) at 180°C (350°F) for 4–5 minutes, or until the skin starts to sizzle.
More Nostalgic Flavors to Explore
If you enjoyed the deep, ginger-infused flavors and the incredible crunch of this family recipe, you’ll find these other classics from my kitchen just as rewarding:
- Cantonese Ginger Chicken: If you love the aroma of fresh ginger in today’s recipe, this classic stir-fry takes it to the next level. It’s a comforting, savory dish that focuses on the harmony between tender chicken and aromatic ginger strips.
- General Tso’s Chicken: It features perfectly fried chicken pieces tossed in a world-famous sweet and spicy sauce that is far better than any takeout.
- Soy Sauce Chicken: To experience another side of my family’s traditional cooking, try this succulent, braised dish. I use light and dark soy sauces to create a silky, mahogany-colored skin that is packed with Cantonese flavor.
A Taste of History in Our Kitchen
Recreating this recipe has been a journey through time for our family. It’s more than just food. It’s a way to honor the lady who cooked for us for so many years. I hope you try the best fried chicken we’ve ever had and experience that incredible crispiness of the skin for yourself. Please leave a comment below and let me know how it turns out. I’d love to hear your thoughts too!
Kimi Wei
Sunday 18th of January 2026
What's the minimum amount of oil I can use? How deep does it need to be? What size flame am I going to use when cooking chicken the first and second times?
KP Kwan
Tuesday 20th of January 2026
My approach is to use a smaller pot, which means less oil, and fry the chicken in more batches. I do a double fry method: first fry at 150°C (medium heat), then do a second fry at 190°C (medium high heat). This gives you chicken that’s cooked through, extra crispy, and not overly greasy.
Liz Thomas
Friday 9th of January 2026
That sounds really tasty Liz
Ong Kean lim
Friday 9th of January 2026
After soaking the chicken with baking soda and water for 20 minutes and having added the vinegar to it, do I immediately wash the chicken or let the vinegar soak for some time. Appreciate your clarification. Thank you
Ong Kean lim
Friday 9th of January 2026
Thank you KP for the detailed recipe. I love fried chicken especially with crispy skin and juicy meat. Will definitely try this one out this weekend. Will update you of the results. Best regards
Jessica
Friday 9th of January 2026
Hello there KP!
I want to try your mother in laws technique with frying extra crispy chicken, but I was curious could I use this technique with your general tso chicken...or does it work the best with bone-in chicken?
Thank you for sharing and all you do!
Jessica ❤
KP Kwan
Saturday 10th of January 2026
I never thought about it, but this method should work really well for General Tso’s Chicken It will turn out slightly different from the classic version, but it should be even crispier, which is always a good thing.