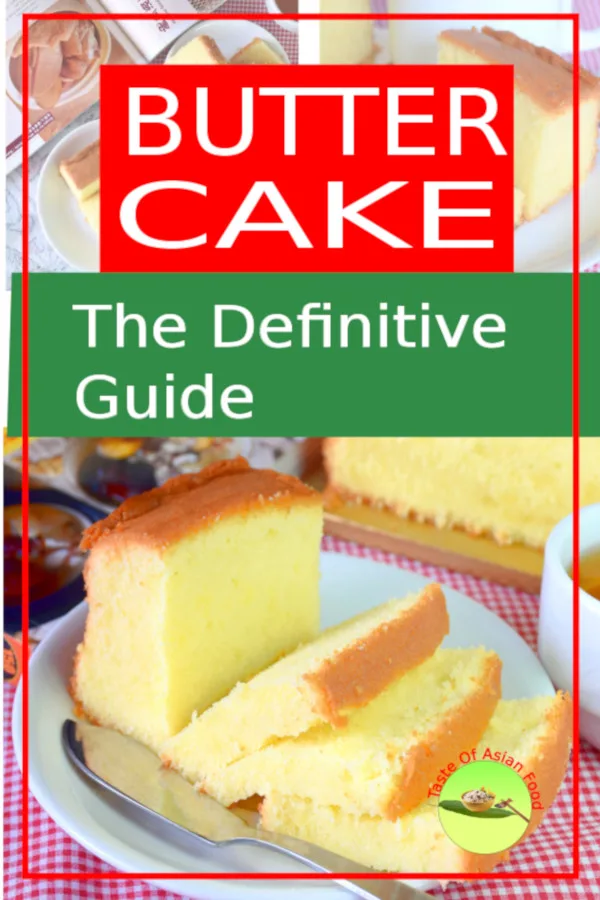
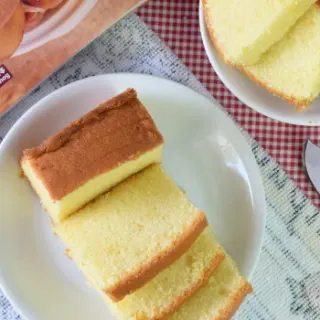
I thought I knew everything about butter cake a few years ago.
During one of the baking sessions, I fumbled. The cakes were dense, with cracked top and uneven rising.
The result was disappointing and embarrassing to divulge to my guests with high expectations.
After the disastrous incident, I spent the next few years fine-tuning the formula, looking into the nuance of mixing, temperature control, ingredients, etc.
Finally, I can now boast my butter cake is luscious and tender, with a delicate flavor and velvety texture. Most importantly, the formula guarantees to yield a consistent result. No more lumps, cracks, large pits, and coarse texture like before.
I want to share my baking experience with everyone. And that is the reason for writing this complete guide to baking the butter cake.
Knowing that this guide can help you bake an excellent butter cake is most satisfying.

The butter cake is baked based on my proven recipe.
Note: This post may contain affiliate links. Please read my privacy policy for more info. I may receive commissions for purchases made through links in this post. As an Amazon Associate, I earn from qualifying purchases.
1. Why do I write about classic butter cake instead of other types of cake?
First, it is the easiest cake made with simple ingredients with a large margin of error. Secondly, I have learned so much through failure and success, and I want to show you the mistakes and tricks I have learned throughout the years.
Please read my article How to Make the Best Butter Cake to understand how to choose the ingredients and the rationale for setting up the best butter cake recipe.
Please note that I am not a pastry chef but a cafe owner who has baked more than a thousand times. This guide will save you all the hard work of finding the answers to the questions about baking butter cake and avoiding the most common mistakes.
2. How to make the best butter cake- complete breakdown
I have divided this guide into eight steps:
Step 1- Cream the butter and sugar
Step 2- Prepare the dry ingredients
Step 3- Measure the wet ingredients
Step 4- Add the egg and milk to the batter
Step 5- Add the dry ingredients
Step 6- Scaling and panning
Step 7- Baking temperatures and the duration
Step 8- How to keep the butter cake

Note: This post may contain affiliate links. Please read my privacy policy for more info. I may receive commissions for purchases made through links in this post. As an Amazon Associate, I earn from qualifying purchases.
Step 1- Cream the butter and sugar
I start the process by mixing the sugar and butter.
Textbooks and cookbooks refer to this as the creaming process because the combination looks like cream. The texture of the butter cake made in this way is velvety and soft. I tried other methods, but the texture is denser than I prefer.
You can learn more about other mixing techniques in an authoritative book called Professional Cooking by Wayne Gisslen [1].


Creaming is the method to beat the sugar and butter together to form a homogeneous batter. Air bubbles will trap in the mixture during the process. The tiny air bubbles expand during baking to form the cake’s light, airy, fluffy, and soft texture. [2]
a. How do I get it done?
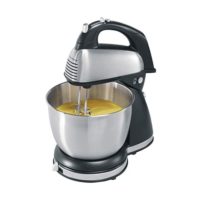
- Cut the butter into 1cm slices and place them in a large mixing bowl. I will wait until the butter softens before adding sugar. Soft butter is more efficient in trapping small air bubbles when combined with sugar, which is important to develop the volume of the cake.
- The mixing speed affects the outcome significantly. High speed is more efficient in trapping air bubbles, forming a more creamy and fluffy texture. On the other hand, low speed and medium speed require a longer time to achieve the same result and may even fail to whip up a smooth texture.
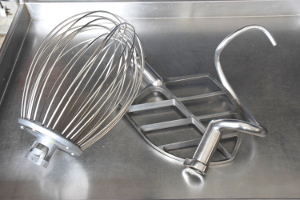
- The type of mixer attachment also affects the outcome of the butter-sugar mixture. I always use the wire whisk to cream the butter and sugar. Choosing the wrong attachment and you will be doomed to disaster in creaming.
- If you have not owned one yet, you can get an electric mixer with a versatile attachment set that includes traditional beaters, whisk, and dough hooks.
- While a dough hook is best for making bread, a flat-edge beater is useful for making the biscuit dough. In this article [3], you can read more about the different types of wire whisks, dough hooks, and flat-edge beaters.

b. How long should I mix the butter and sugar?
- It should be between three to six minutes.
- Get a reliable digital timer so you will not forget to switch off the mixer. This little kitchen gizmo is handy when you are simultaneously away from your kitchen or cooking a few items. I like the timer that features an LCD with easy-to-read numbers, with a loud beeping sound, and either can clip on, stand, or magnetically attach for your convenience.
- The mixing time depends on the batter’s quantity, the mixing speed, and the wire whisk’s shape. Visual observation is the most reliable method to decide when to stop mixing.
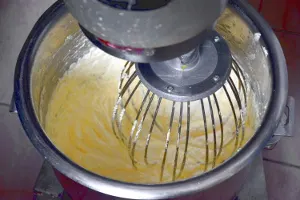
- Stop when the batter becomes very light and fluffy and the color turns from the initial bright yellow to pale yellow. The texture should now look like whipped cream.
- Fortunately, there is no issue with mixing longer than required. Therefore, mixing a bit longer is a good practice to ensure it is light and fluffy.
c. The key points
- Start mixing the sugar with butter only when the butter is soft enough.
- Use high speed to mix.
- Use a wire whisk to mix.
- Mix until the color turns to pale yellow, with the texture resembling whipped cream.
Step 2- Prepare the dry ingredients (flour, salt, baking powder)
I mix the flour, baking powder, and salt while waiting for the butter to soften. This step is essentially a no-brainer. However, I would like to mention the necessity of sieving the flour as I see it.
There are contradicting opinions on the issue of sieving flour. The rationale is sieving can remove lumps and impurities. It also aerates the flour and makes incorporating it into the wet ingredients easier. Sieving the dry ingredients together helps the baking powder and salt distribute evenly.
But I do not sieve the flour.
The flour I order from a trusted local flour mill is clean and lumps-free. I find that cakes made from sieved and unserved flour are identical.
I wonder whether my supplier sends me the pre-sieved flour without letting me know.
Therefore, I mix the flour with salt and baking powder with a whisk before adding it to the wet ingredients. I do this to minimize the time required to combine with the batter, which will be discussed in detail in Step 5.
Note: If your flour is not pre-sieved, please sieve with a flour sifter to prevent the flour from becoming lumpy.
The key points
- Sieve the flour with a flour sifter only if it is lumpy.
- Mix the flour, salt, and baking powder.
Step 3- Measure the wet ingredients (eggs, milk)

I use a digital kitchen scale to measure the ingredients. I have converted all the measurements from cups and liters to grams. While this may not be important, this is the best way to work in the kitchen. This method simplifies the recipe and eliminates confusion among grams, liters, cups, and tablespoons.
I use grams as a single unit of measurement in my kitchen. It boosts efficiency and minimizes human errors among my kitchen staff.
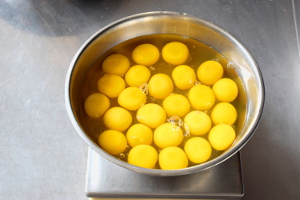
I crack all the eggs into a large bowl and milk in another. It doesn’t matter whether both are mixed. I separate them to make sure if I pour too much milk, I can still salvage the extra if they are in separate bowls
The key points
- Use an electronic measuring machine to measure dry and wet ingredients for accuracy and convenience.
Step 4- Add the eggs and milk to the creamed butter and sugar
Creaming is the most important part of the cake-making process. I fumbled before because I added the milk and eggs before the butter and sugar mixture became fluffy and light.
a. Cream the butter and sugar until pale yellow
Therefore, it is crucial to mix until the color turns pale yellow, with the texture resembling whipped cream, before adding the liquid ingredients (eggs and milk).
I mix the eggs/milk with the butter/sugar at high speed. Some cookbooks suggest adding the egg alternately with milk and pour into the butter mixture a little at a time. The purpose is to let part of the eggs well first before adding the next lot to ensure it is well absorbed.
I pour ALL the eggs into the batter, followed by milk a minute later. If I continue mixing it at a higher speed, the egg and milk will eventually combine well with the batter.
The idea of pouring all the eggs in one go into the mixing bowl is not in line with the recommendation from most cookbooks and baking experts. I am working in a kitchen with minimum manpower and looking for an efficient method. This method works well and saves time.
b. The best paddle attachment used for the mixer and the speed
- Mix high speed with the wire whisk, just like butter and sugar. It does not mix well with the flat edge beater at low speed, which I did try before. High-speed mixing aerates the mixture further to add volume to the structure, paramount for a light and smooth butter cake.
- Scrape down the sides of the mixing bowl to ensure even mixing. Continue mixing until it becomes homogeneous.
- I usually do not set the timer to remind me when to stop mixing. The time varies with the mixing speed, the mixture’s amount, and the whisk’s type. Hand mixer and stand mixer for home use take longer than the commercial mixer, which is more powerful.
- Therefore, observing the color and texture is the best way to decide when to stop mixing. Stop mixing once the mixture becomes curd-like and pale yellow. It takes three to five minutes.
c. The key points
- Use high speed to mix.
- Use a wire whisk for mixing.
- Pour all the egg and milk into the batter while keeping the mixer running.
- Use a spatula to scrape off any ingredients that stick on the side of the mixer.
- Mix until it is light, fluffy, creamy, and pale yellow.
Step 5- Add the dry ingredients to the flour mixture
It is time to add the dry ingredients (flour, salt, and baking powder); when the batter becomes homogenous, light, fluffy, curd-like, and pale yellow,
Gluten forms when the flour mixed with liquid can toughen the cake. I was paranoid about gluten formation when I made butter cakes years ago. Sometimes, my cake was under-mixed, with tiny lumps of unmixed flour left in the cake. Since then, I have struggled with the problem, but eventually, I found the solution.
The trick is to mix until there are no more visible lumps in the shortest possible time.
a. This is how I do it:
- Combine the flour, salt, and baking powder before adding to the batter. Since the dry ingredients are well combined, I can shorten the mixing time without worrying about the uneven distribution of the dry ingredients.
- Use the wire whisk to mix. The attachment has multiple wires and is very efficient in mixing, thus shortening the time required.
- Pour all the flour into the batter in one action. The time required is shorter than by adding it in batches.
- Scrape down the side of the mixing bowl.
- Mix at the slowest speed to minimize gluten formation.
- Stop immediately once the batter is homogenous and free from lumps.
Overmixed cake is tougher and may form noticeable pits and holes (think of bread). The cake can crack and develop long tunnels in extreme cases. [5].
Since I am making a batch of batter enough for four cakes each time, it is labor-intensive to do it manually. However, you can use a handheld wire whisk if you make only one cake.
b. The key points
- Mix the dry ingredients before adding them to the batter.
- Pour all the ingredients into the batter in one action.
- Use slow speed to mix.
- Use a wire whisk to mix.
Step 6- Scaling and panning
Fill up the baking pans and start baking. It is nothing technical, but I have a list of tips and tricks to make it easy and efficient.
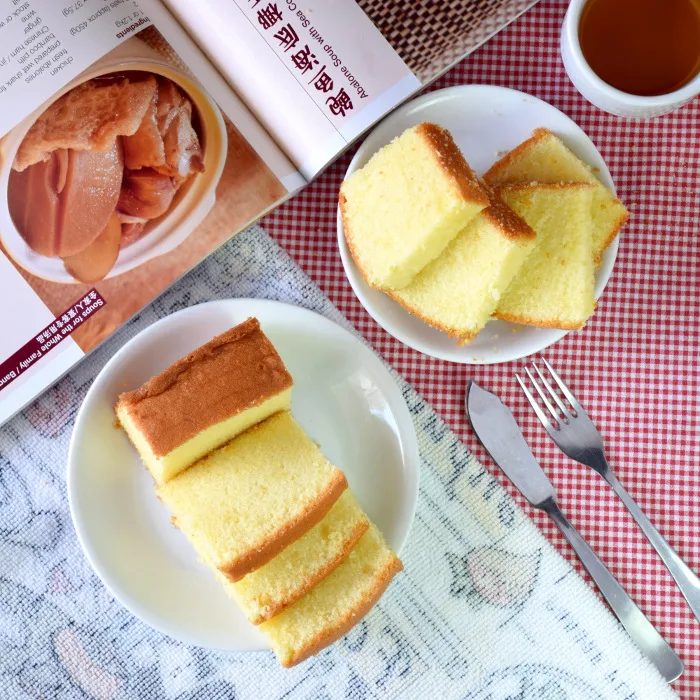
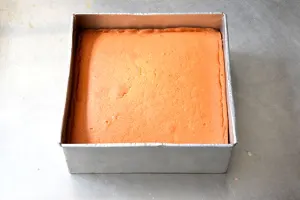
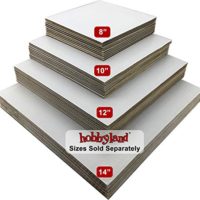
I used 8-inch (20cm) square cake pans. Each cake is 1.3kg before baking. The net weight after the cake cools down completely is 1.1kg.
a. Tips and tricks
- Prepare the baking pans before starting to mix the batter.
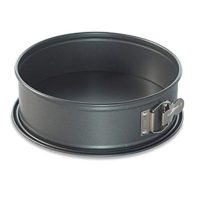
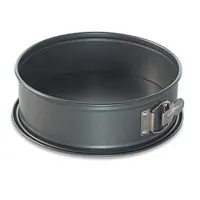
- Using a cake pan with a removable (or loose) bottom is ideal, as you can remove the cake easily by inverting it.
- Always apply some oil to the sides and the base of the pan. It helps to unmold the cake easily.
- Apply some oil to the bottom of the pan before placing a piece of baking paper on the base of the pan. The parchment paper will be secured to the surface by the oil. The paper should be the exact size or slightly smaller than the base. If the paper is too big, the edge of the paper will curl up, resulting in a slightly rounded bottom edge.
- Also, ensure the paper is flat because the folds may stick into the batter. I have difficulties removing it from the cake without damaging it.
- Weigh the batter on an electronic weighing scale. This method is the most convenient way to ensure the cakes’ weight is identical (if you make more than one). You do not have to do this when making one cake, but having an electronic kitchen scale is handy.
- Give the cake pan several sharp raps on the table to free any large trapped air bubbles. Tap to smoothen the batter. The small unevenness will disappear when the temperature rises in the oven. Bake immediately.
- Scaling and panning can sometimes be a little messy, so you may consider using your apron.
Step 7- Baking temperatures and the duration

I usually preheat the oven until the temperature becomes stable.
a. Ovens can have varying behavior.
I have used both domestic and commercial ovens. The small convection oven is equally good for baking a high-quality butter cake.
Whichever oven you use, always use a pair of oven mitts when you place and remove the cakes from the oven for your safety.
The temperatures and times for baking butter cake can vary from oven to oven. The temperatures mentioned in the recipe are only a rough guide. This variation is due to the size and position of the elements of the oven, which affect the time and temperature required.
For instance, I use a gas oven with two rows of straight burners. One is on top, and the other at the bottom runs from left to right across the center. Besides, I have a small electric oven with U-shaped upper and lower elements. The cakes baked in these ovens vary in color and volume with identical time and temperature settings. The difference is due to heat distribution having more time to distribute evenly in the larger oven before reaching the cake surface. On the contrary, heat elements for the smaller oven are closer to the cake; hence, the temperature variation at different oven parts can be quite significant.
Remember that the temperature on the oven’s control panel may not be the actual temperature. That is exactly why I may not get the desired result even though I follow one hundred percent of the recipe.
The best way is to check the color of the cake visually when it comes to deciding the doneness of the cake.
b. My practical way to bake the cake
- I will set the timer ten minutes earlier than the targeted baking time. The cake should become slightly brown and set firmly. It is safe to open the oven door to check the doneness without affecting the quality. If the color has not reached the expected tone, bake for another ten minutes.
- I only use the oven that I am familiar with, especially when I want to bake cakes for important occasions.
- If you bake more than one cake, do not let the pans touch each other in the oven. Leave at least 3 cm between to enable proper air circulation to ensure the cakes rise evenly.
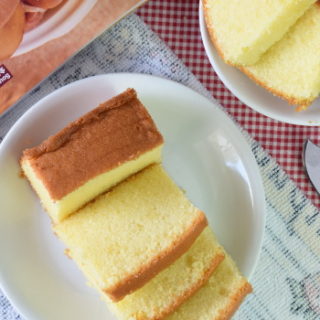
- After baking until golden brown, remove the cake and cool at room temperature for a few minutes until you can hold the pan with your hands.
- Since butter cakes are rich in oil, running a knife around the sides is unnecessary. Invert and drop the cake onto a cake board and loosen the detachable base by tapping it lightly. The cake will fall onto the cake board gently.
c. The key points
- The actual internal temperature of different ovens is different, although the setting is identical—my preferred temperature to bake in a preheated oven is 175°C.
- Use only your trusted oven.
- Preheat the oven. Use a pan with a removable base. Apply oil to the baking pan.
- Make sure the size of the baking paper is the same as the base or slightly smaller.
- Leave 3cm in between pans in the oven,
- Check the color of the cake visually to decide the actual baking time required.
Step 8- How to keep butter cakes fresh
A freshly baked butter cake’s flavor is irresistible, so we say, ‘sell like hot cakes.’ However, there will be situations where you must keep it for a few days or weeks.
Can butter cake stay fresh for an extended period?
Butter cake can stay fresh in the refrigerator (4°C) for three to four days. I will keep the butter cake in the freezer if it is for more than a week. Here is the method I use:
Steps to keep the butte cakes fresh
- Let the butter cake cool on a wire rack completely after baking.
- Place the cake on a cake board, and put each in a plastic bag or wrap. Loosely seal the bag with cellophane tape.
- Place the bag of cake into another plastic bag. Store the cake in a plastic container or a cake box.
- Keep them in the freezer.
- Remove the cake from the freezer a day before serving.
- Let the cake defrost at room temperature with an unopened double layer of plastic bags.
- Remove the bags and place them into the chiller when the temperature rises above freezing (0°C).
Conclusion
Making butter cakes is both science and art. I hope this practical guide will help you bake your perfect butter cake. Any recommendations, comments, corrections, and questions are welcome. Please shout out in the comments column below.
Frequently asked questions
1 Is pound cake the same as butter cake?
A pound cake is made with equal amounts of flour, butter, eggs, and sugar. This is not a pound cake, as each main ingredient amount differs.
2. Can I add some cream cheese to this recipe?
Adding cream cheese will change the ratio of all the ingredients, which is not recommended.
3. Can I use salted butter?
I use unsalted butter. Please disregard the amount of salt in the recipe if you use salted butter.
4. Is all-purpose flour the same as cake flour?
All-purpose flour has a slightly higher gluten content than cake flour. However, it can be used for general cake purposes.
5. Should I use powdered sugar to get a smoother texture?
There is no need to use powdered sugar (icing sugar). The cake will be smooth with castor sugar if it is well-beaten.
6. What is the size of the square pan you use?
8-inch x 8-inch square pan.
7. Is vanilla extract necessary?
It is optional. If you like the vanilla flavor, please use the real extract (not the artificial type).
8. Is this a gooey butter cake recipe?
This recipe yields fluffy butter cake, not gooey. which is a St. Louis classic,
Butter cake recipe
This Is our time-tested rich butter cake recipe. Top selling cake in cour cafe. Detail instruction how to make it.
Ingredients
Instructions
- Remove the butter from the chiller and let it soften.
- Mix the butter and castor sugar together by creaming method. Mix with a wire whisk at high speed until fluffy, light, creamy and become pale yellow.
- Add the eggs into the butter and sugar batter. Mix for a minute.
- Add the milk and mix again until the mixture is homogenous and curd-like.
- Combine the flour, salt and baking powder in a separate bowl.
- Add the dry ingredients to the batter and mix at low speed. Do not overmix.
- Preheat the oven.
- Apply oil to the cake pan.
- Place a piece of baking paper in the pan with removable base.
- Pour the batter into the pan.
- Give the pan several sharp raps.
- Bake at 170°C, both top and bottom temperatures for 60 minutes.
Notes
Update 2020 April
I reviewed this recipe recently after receiving some feedback from our customers that the cake is a bit dry after keeping a day or two in the refrigerator. The result of the new formula solves the above problem, with a moist texture even keeping for days
The changes are as below:-
1. Increase the amount of milk from 45ml to 135ml.
2. Reduce the amount of butter from 330g to 300g. The reduction is based on the general feedback from our customers that the cake is too rich.
3. Increase the amount of baking powder from 3g to 6g. The cake rises better with more baking powder.
The rationale to use 135ml of milk in the revised recipe
I am pushing the amount of milk to the limit. From my experience, the amount of water should not more than 120% of the flour. I found that any higher content of water can make the cake unstable.
Therefore, the maximum limit of water is 300g flour x 120% = 360g (360ml).
Two ingredients contain water in the recipe- eggs, and milk. Since 75% of the egg is made up of water, the total amount of water contributed by 300g of eggs in the recipe is 300g x 0.75 = 225g.
Milk is made up of 90% water, and for simplicity, I round it up to 100 %. Therefore, the maximum amount of milk allowable is 360g - 225g = 135g (which again round as 135ml).
The result is a butter cake with a maximum water content that makes it super moist and still stays within the acceptable limit.
Cake pan that I use
Fit for 8-inch square baking pan or 9-inch square cake pan. You will get a cake with a height of about 2.5-in at the center and 2-inch at the edge.
Recommended Products
As an Amazon Associate and member of other affiliate programs, I earn from qualifying purchases.

Nutrition Information:
Yield: 9 Serving Size: 9 servingsAmount Per Serving: Calories: 537Total Fat: 33gSaturated Fat: 20gTrans Fat: 1gUnsaturated Fat: 11gCholesterol: 203mgSodium: 439mgCarbohydrates: 53gFiber: 1gSugar: 27gProtein: 7g
This data was provided and calculated by Nutritionix on 5/31/2019
Useful references for baking butter cake
1 Professional Cooking by Wayne Gisslen (7th edition)
2 On food and cooking, the science and lore of the kitchen- Harold McGee
3 http://www.partselect.ca/Resources/KitchenAid-For-Christmas.aspx
4 http://www.thekitchn.com/is-sifting-flour-for-baked-goods-really-necessary-213894
5 http://oureverydaylife.com/long-mix-flour-baking-cake-30711.html
Natasha Rekhaye
Sunday 9th of November 2025
Hello kwan, thank you for this wonderful recipe.. ive made it for family and friends and all loved it. I got one question - if we double the recipe, are the ingredients amount double or any change in the amount of any ingredients used?
KP Kwan
Tuesday 11th of November 2025
Yes, you just need to double the amount of all the ingredients. However, the baking time might need to be a little longer for the larger cake. Just keep watching the color change, especially during the last ten minutes, to decide whether you need to bake it slightly longer.
Jessie
Sunday 7th of April 2024
Hello Mr Kwan, thank you for the detailed information on baking a butter cake. I have read part 1 and part 2 and found this brilliant. This is the best butter cake recipe i have ever baked. Thank you for being so generous and sharing the recipe.
maureen obrien
Friday 3rd of March 2023
i was so excited to try this recipe until i saw the ingredient measurements. .57 cups of milk. is that 3/4 cup of milk ? 3.3 cups of flour, how to you even measure that unfortunately i will go on to the next recipe that’s easier to read
KP Kwan
Friday 3rd of March 2023
The measurement is based on grams, as I use in my restaurant. That is the much more accurate way to measure than using teaspoons and cups, as even cups can differ (European cups and the US differ slightly). My best bet is to get a kick scale to make all the measurements. If you are in doubt, you can use this free tool to do all the conversions:
https://www.convert-me.com/en/convert/cooking/
Asiken
Tuesday 1st of November 2022
Hi Mr Kwan...at what oven temp n length of time to bake a 6inch butter cake...thank you
KP Kwan
Friday 4th of November 2022
I will use the same temperature but reduce the baking time by 10 minutes. That is just my suggestion because every oven behaves differently.
Ac5502
Wednesday 17th of August 2022
Hi Mr Kwan, Thanks for the recipe. Is it ok to reduce sugar by about 20% I am planning to replace milk with Baileys but would like a stronger frangant of it. Can I increase 10% since sugar is reduce?
KP Kwan
Friday 19th of August 2022
I would think you can reduce the sugar by no more than 20%. Sugar is a softener, so the cake can be tougher if you reduce it further. I have not tried Baileys so far, so I would not give you any suggestions at this point :)