Making green tea chiffon cake involve only a few steps. However, it is not as simple as you think if you want to make it perfect each time.
This guide provides all the information you need to make the chiffon cake which is moist, soft, light, airy, fluffy and free from large air bubbles.
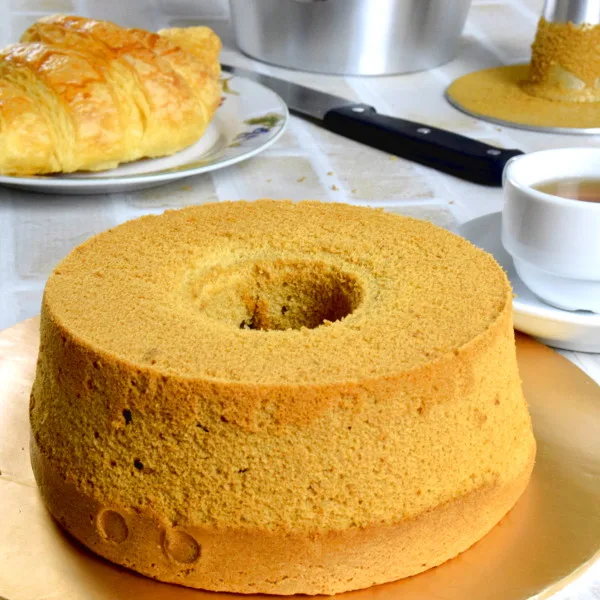
Note: This article deals with the fundamental techniques of making chiffon cakes, tapping into the nitty-gritty and cover all the possible problem that may face during the actual baking.
I use green tea chiffon cake as an example to illustrate the whole process, BUT every step applies to ALL chiffon cakes.
Let’s get started.
Part one- How to choose the ingredients, and how to prepare them
Let’s have a complete understanding of each ingredient before we start making the green tea chiffon cake.
1. The eggs- separate the yolk from the white
The first step is to separate the egg whites and yolks carefully. You may not be able to get all the eggs and yolks separated. There will always be some whites attached to the yolks. That is OK, but try to separate them as much as you can.
Why do we need to separate the whites and yolks?
The egg yolks act as the emulsifier in the batter, combining the oil and water in the batter so that the cake mixture is homogeneous.
The egg white is used to form meringue in a separate bowl, trapping air bubbles in it to act as the leavening agent during baking.
Use another egg if you break the egg yolk. The meringue will not form even there is a streak of yolk in the egg white.
I use medium size eggs in this recipe. The average weight of one egg is 53g with shell, and the net weight of the white and yolk is 50g. You can make the weight adjustment if you are using eggs that are bigger or smaller than what I am using.
Note: This post may contain affiliate links. Please read my disclosure for more info. I may receive commissions for purchases made through links in this post.
2. The right type of flour- cake flour
Cake flour contains about eight percent of gluten, which is ideal to make chiffon cakes. Self-raising flour is not the best option as there is a certain amount of baking powder in it. As such, you will have no control over the amount of baking powder you want to use.
High gluten flour (bread flour) has a higher content of gluten, about twelve percent. This percentage is excellent for making bread but not for cakes. (If you use it, think off a cake that has a texture of bread!).
3. The ideal type of sugar for chiffon cake- Castor sugar
The sugar in this recipe is castor sugar. It is a fine sugar that dissolves easily, both in the egg yolk and egg white mixture. You can also use granulated sugar, although it is coarser than castor sugar.
Make sure the sugar is dissolved completely in the egg yolk mixture and the meringue, to ensure the cake has a smooth and even texture. You can rub some meringue and egg yolk batter between your fingers. The sugar is dissolved if there is no sandy feeling.
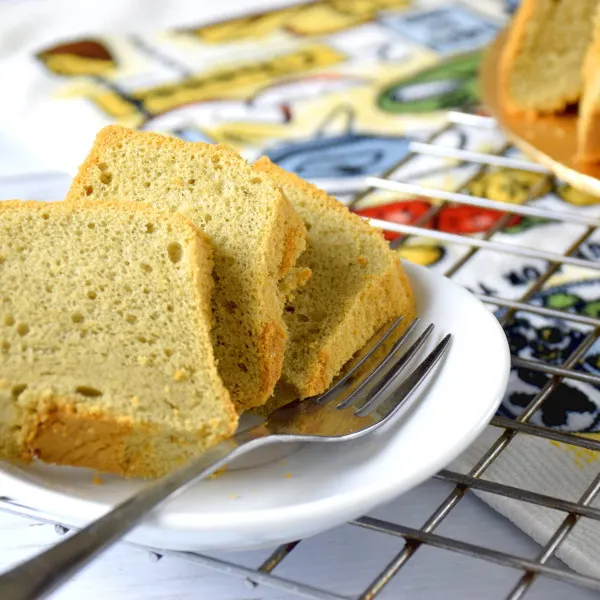
4. The best choice of oil- oil with the neutral flavor
I use corn oil in this recipe. Other oils with neutral flavor such as the cannula or sunflower oil are equally good.
I have not used butter as the substitution. But for now, I’ll just stick to the clear oil with neutral flavor.
5. The amount of green tea powder required (Matcha)
The amount of green tea (matcha) depends on the quality and strength of the tea powder.
I use 4g of pure green tea powder in this recipe, but you can make changes base on your preference. I suggest you follow this recipe for the first time and adjust the amount of green to the amount that you desired.
If you are not in favor of green tea, make lemon chiffon cake by making the following alteration in the recipe:
Make a lemon chiffon cake:
- Reduce one tablespoons of water .
- Substitute the green tea with two teaspoon of flour.
- Substitute the cream of tartar with four teaspoons of lemon juice.
6. Is baking powder necessary for chiffon cake?
Baking powder is required for chiffon cake although some people think that the meringue will give the necessary leavening powder. However, since it contains oil in the formula and is denser than sponge cake, I add two grams of baking powder for every hundred grams of flour to make sure the cake rise properly.
7. Does cream of tartar matter?
I did use cream of tartar for my chiffon cake (1/8 teaspoon per egg white), although you can do without it.
You still can whip up a good volume of meringue without adding cream of tartar, just egg white, and sugar.
However, cream of tartar helps to stabilize the meringue. How?
Cream of tartar is acidic and denatures part of the protein of the egg whites. This action stabilizes the matrix of the minuscule air bubbles created during whipping, and therefore speed up the creation of foam. You will expect the egg whites will froth up in a shorter time, and able to maintain the structure of the peaks longer without collapsing.
So by the same principle, you can add a half teaspoon of lemon juice (which is acidic) per egg white as the substitution of cream of tartar. The result will be so similar that you will not notice the difference.
Part 2: The essential techniques you need to pay attention to making chiffon cake
The previous part deal with every ingredient required for making the chiffon cake.
Now let’s take a look at a list of the basic techniques.
1. Is it necessary to sieve the flour?
I have mentioned in my butter cake article that I never sieve the flour, and have explained why! We have sold hundreds, if not thousands of butter cakes made this way for years.
However,
I DO sieve the flour when I make chiffon cake.
Reason?
Unlike butter cake, chiffon cake is much lighter, with a lower flour ratio. Therefore, the amount trapped in the structure of the batter is crucial to get the light and fluffy texture. Sieving the flour helps to trap more air in the batter.
2. How long should I mix the egg yolk batter?
The time required for mixing depends on the amount of the batter and the speed of mixing. Therefore the time mention in the recipe only valid for to the amount stated in the recipe. The time will no longer correct once you double up or half the amount.
Hence, the best way to decide how long you should mix it is to rely on visual observation (hopefully someone will find a better way to do this in the future). Mix the batter until it looks homogenous. The result will not be better even if you mix it longer.
3. Whisk the meringue
The container holding the egg white must be free from oil. The meringue will not form if there is any trace of oil. I suggest you do the following:
- Wipe the stainless steel bowl with paper towel.
- Separate the egg white from the yolk in a separate bowl. Make sure the bowl to whisk the egg white is free from any trace of egg yolks.Start whisking the egg whites at medium speed with the electric mixer.
- Add the sugar and cream of tartar right at the beginning of the whisking process. I do not experience any difference between adding them earlier or later in the process. Adding the sugar in batches will not make any difference to the result neither.
The duration of whisking depends on the quantity of egg white and the temperature. You can put the bowl of egg whites in a warm water bath to speed up the process or remove the egg from the refrigerator in advance. Eggs yolks at room temperature are much easier to whip up. You need to spend a much longer time to whip up refrigerated/cold egg whites.
Underwhipped meringue will weep. Overwhipped meringue will result in a dry cake. You should whip the egg white until it forms firm peaks, just slightly short of stiff peaks. That is when if you lift up the wire whisk, the peaks will hold but the tip will fall back onto itself.
4. The best way to fold in the meringue
Folding the meringue is the most delicate step in making chiffon cake.
You need to strike the balance of not breaking too much air bubbles trapped in the meringue and incorporate well with the remaining ingredients.
Here are my tips to get the best result:
- It is easier to mix in a large bowl because you do not need to worry about the spilling of cake batter. We tend to underestimate the volume of the meringue, as it will triple the volume after beating.
- Use a stainless steel bowl! Stainless steel material is better because the cake batter does not stick to the surface.
- Use a soft rubber spatula to mix. I like to mix the meringue into the batter with the soft rubber spatula because it is pliable and can scrape the surface of the bowl effectively. Alternatively, you can use a wire whisk. Some books mentioned that wire whisk deflates less meringue comparing to the spatula, although I do not notice any difference.
- Fold gently. Start by adding a quarter of the meringue to the batter and mix well. Divide the remaining meringue into two portions and add one after another. The batter will deflate if you fold it roughly. Bring the meringue at the bottom up and cover the meringue at the top. Scrape the surface of the bowl gently each time with the spatula so that the batter is mixed evenly.
- Do not overmix the meringue. It is hard to suggest how long you should fold it, as it depends on the amount of meringue. I suggest you fold it until only a few streaks of egg whites are visible. The meringue will be incorporated well with the rest of the ingredients once you pour the mixture into the pan.
5. The types of cake pan suitable for making chiffon cakes
The cake pan you use plays an important part in making the chiffon cake.
Chiffon cake has relatively less flour content compare to butter cake. It relies a lot on the expansion of air bubbles to raise the cake and the denaturation of the egg white to strengthen the structure. It will quickly collapse if it not fully cooked, or does not place in a revert position during cooling.
That means you need to ensure that:
- The cake pan must NOT have the non-stick surface. The cake will cling on the side while rising in the oven, and will not collapse during cooling.
- Use a pan with a detachable base. It is almost impossible not to damage the cake if the base is not removable.
- Do not grease the pan. There should not have any oil in it. We want the cake clings to the base while cooling it in the upside down position.
- Do NOT use any baking paper.
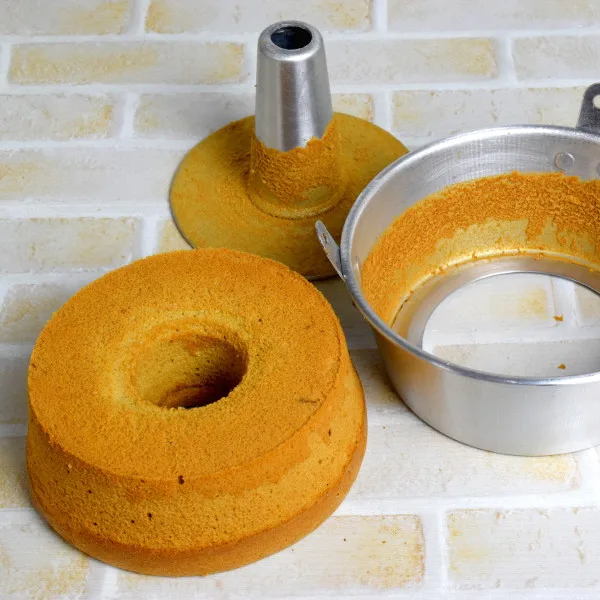
The tube pan is suitable for chiffon cake because the unique structure allows hot air circulate efficiently to the center of the cake. It provides even heat distribution, ensuring the middle part of the cake received the same amount of heat as the outer sides during baking. The tube part of the pan also provides a larger surface to the cake to cling on, hence help to rise higher and prevent it from collapsing.
Do not use the cake pan that is too large. The batter will cling on to the sides, but the total surface of the pan for the cake to cling on is too small compared to the larger amount of uncooked batter at the center, causing the sides rise too fast, resulting the center caving in.
6. Filling up the cake pan
Filling up the pan is straightforward, but since I want to bake a perfect chiffon cake, I still want to pay attention to some minor details.
Fill up the cake pan not more than two-thirds full. The cake will rise substantially in the oven. Be sure to leave sufficient space in the pan for the cake to rise. If the pan is large enough, you can overturn the cake on a wire rack during cooling. If the cake rise so high that the top protruded out from the pan, it becomes tricky to find something to suspend the cake pan upside down during cooling! (See below).
Remove the air bubbles. Large air bubbles trapped in the cake batter will cause large ‘holes’ in the cake. Here are some tips you can follow to minimize this from happening:
- Pour the batter as close as possible to the pan. Pour all the batter in one action to one area of the pan. This pouring method can minimize the formation of new bubbles.
- Gently tap the batter a few times before pouring to break the air bubbles.
- After pouring, you can also tap the cake pan once or twice to dislodge any visible bubbles before putting it into the oven.
7. Baking the cake
This is one of the most challenging questions to answer and was haunting me for a few failed attempts.
One thing for sure: There are some flaws with the advice that the cake is cooked when you press it lightly and bounces back. I took this suggestion when the surface bounce back when I press lightly. Yes, the cake was cooked, only about 2 centimeters deep. This incident happened when I use a rectangle pan. The heat takes longer to reach the center of the cake.
It was a half-cooked cake that looks perfect outside, but pasty and uncooked in the middle 🙁 . Once you overturn the cake, the uncooked center bottom will not be able to cling on the cake pan, and the whole cake detached from the pan, breaking away from the cooked portion near to the sides the cake pan. (Look at this image!).
I usually want to ensure it is fully cooked fulfilling ALL the following:
- The cake turns golden brown on the surface.
- It bounces back when lightly pressed on the surface.
- Pierce a wooden stick right to at the center of the cake, deep into the bottom. This part of the cake takes the longest time to cook. If it comes out clean, which means it is cooked. This is especially important for large cakes.
Here is the step to bake the chiffon cake:
- Preheat the oven to 325°F/160°C. If you have an oven that can set the top and bottom temperature separately, set the top temperature at 325°F/160°C and bottom temperature at 355°F/180°C. If you don’t, place the cake nearer to the bottom of the oven. This temperature setting will deliver more heat to the bottom and prevent the top from browning too fast.
- Bake the cake in the oven and don’t open the door for the first 25 minutes.
- At the 25th minute, check the cake. If the surface is getting brown too fast and start cracking, cover it with a piece of oiled aluminum foil or a baking tray, and turn down the top temperature a few degrees.
- Continue baking for another 40 minutes. (Total = 25 plus 40 = 65 minutes).
8. Cool the cake in an inverted position (and the best way to unmold)
This step is tricky, both how to cool the cake and remove it from the pan.
Cool in an awkward position!
- Revert the cake IMMEDIATELY and let it cools on a wire rack. If the cake is baked in a tube pan, then we need to invert the pan and place the center hole of the tube on a funnel. The cake will now suspend in the air! It is crucial to cool the cake in an inverted position so that it will not collapse under its weight.
- Leave the cake in this position until it cooled thoroughly. It may take up to an hour or more depends on its size.
Unmold the cake with your hand (NO knife please!)
Many books and video demonstration suggest running a sharp knife along the pan and the base. This method will not give you the perfect finishing unless your knife skill is exceptional.
/the reason is obvious. The knife will shave off a thin layer of the cake surface, leaving an uneven and crumbly appearance. So the best way is to unmold it with your bare hand,
Here are the steps:
- Hold the pan with one hand, tab the side with the other hand and at the same time keep rotating the pan. Chiffon cake is as spongy as cotton so it will not break by the tapping. After you rotate the pan one full round (while continuing tapping it), the cake will start to detach from the pan. The tapping will simultaneously loosen the cake from the tube too.
- Check whether the cake has detached from the pan. By now there should be a gap between the pan and cake.
- Lightly squeeze the part of the cake nearest to the base. squeeze and continuously turning the cake. You will feel the cake is slowly detached from the base by this action.
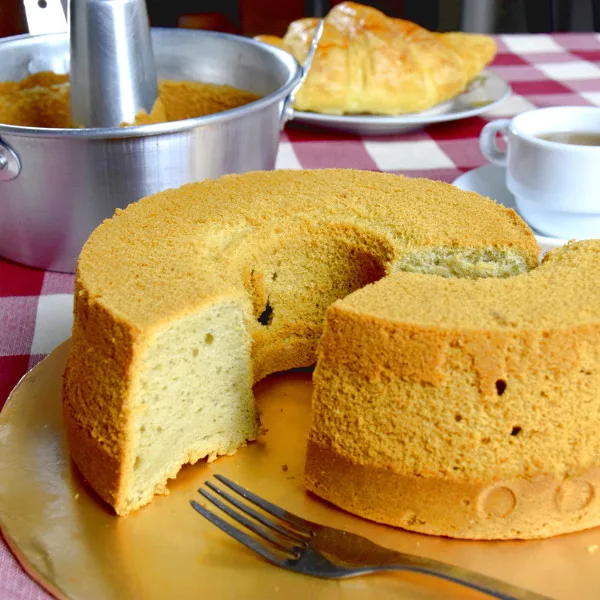
- Overturn the cake and remove the base/tube. You will get a perfect green tea chiffon cake without a scratch!
Part 3- Video demonstration, printable recipe and downloadable summary of this guide
The Green Tea Chiffon Cake Recipe
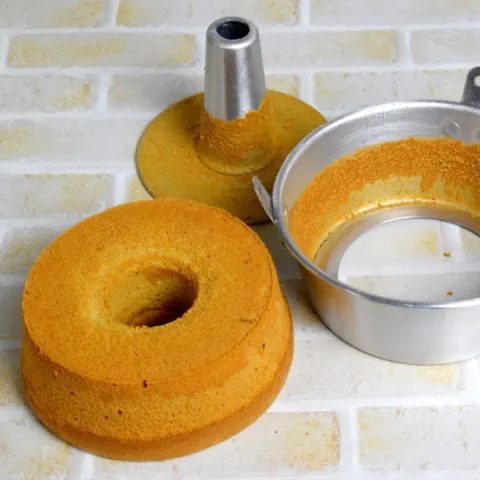
Green Tea (Matcha) Chiffon Cake
This is the recipe for the basic green tea chiffon cake. Please refer to the explanation in this article for in-depth information.
Ingredients
Ingredients (1)
- 3 egg yolks
- 25 g castor sugar
- 40 g corn oil, (equal to 44ml)
- 60 ml water
Ingredients (2)
Ingredients (3)
- 3 egg whites
- 45 g castor sugar
- 1/4 teaspoon cream of tartar
Instructions
- Preheat the oven to 325°F/160°C.
- Separate three eggs. Egg yolks in one and whites in another stainless steel bowl.
- Whisk the eggs yolks with the sugar in ingredient (1), then add the oil and subsequently the water. Mix it until homogenous.
- Sieve all the ingredients in (2). Add the sieved ingredients to the egg yolk batter. Mix until homogenous.
- Beat the egg whites until it becomes foamy. Add the castor sugar and cream of tartar. Continue beating at medium speed until it forms firm peaks.
- Add 1/3 of the meringue to the batter, gently mix well.
- Divide the remaining meringue into the 2 portions. Add the first portion to the batter and fold in the meringue gently.
- Once it is almost homogenous, add the second portion. Fold until only traces of meringue are visible.
- Pour the batter into the tube pan.
- Bake at 325°F/160°C top temperature and 375°F/180°C bottom temperature.
- Bake for 25 minutes, check if the top of the cake is too brown or about to crack. Cover with aluminum foil or a small metal tray if necessary.
- Continue to bake for another 40 minutes or until it is cooked.
- Invert the cake on a wire rack. Let it cools fully.
- Lightly tap the cake pan with your palm, while rotating the pan. The cake will eventually detach from the pan.
- Squeeze the side of the cake close to the base until the base detaches from the cake. Remove the base. Serve.
Notes
(Note: If you encounter any audio / visual problem of viewing this video, you can view it from YouTube by clicking this link , which will open in a new tab)
Recommended Products
As an Amazon Associate and member of other affiliate programs, I earn from qualifying purchases.
-
![Jade Leaf Matcha Green Tea Powder - USDA Organic, Authentic Japanese Origin - Classic Culinary Grade (Smoothies, Lattes, Baking, Recipes) - Antioxidants, Energy [30g Starter Size]](https://tasteasianfood.com/wp-content/uploads/2019/06/91rOllqMwGL._SX466_-200x200.jpg.webp) Jade Leaf Matcha Green Tea Powder - USDA Organic, Authentic Japanese Origin - Classic Culinary Grade (Smoothies, Lattes, Baking, Recipes) - Antioxidants, Energy [30g Starter Size]
Jade Leaf Matcha Green Tea Powder - USDA Organic, Authentic Japanese Origin - Classic Culinary Grade (Smoothies, Lattes, Baking, Recipes) - Antioxidants, Energy [30g Starter Size] -
 Ee Pearl Suites Aluminum Chiffon Cake Baking 17cm by Pearl Metal
 -
 OXO Good Grips 11-Inch Better Balloon Whisk
 -
 Hamilton Beach 64650 6-Speed Classic Stand Mixer, Stainless Steel, 4-Quart Bowl and Accessories
Nutrition Information:
Yield: 8 Serving Size: 1Amount Per Serving: Calories: 140Total Fat: 7gSaturated Fat: 1gTrans Fat: 0gUnsaturated Fat: 5gCholesterol: 69mgSodium: 55mgCarbohydrates: 17gFiber: 0gSugar: 9gProtein: 3g
This data was provided and calculated by Nutritionix on 3/13/2019
Basic Lemon Chiffon Cake
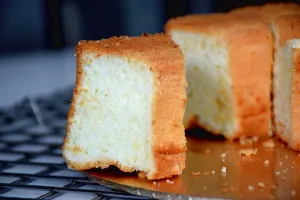
I published this step-by-step guide a week ago.
Today I bake a lemon chiffon cake with some adjustment to the Green Tea Chiffon Cake recipe. I want to share with you how did I convert one recipe to another because it is useful if you’re going to do the same in future.
I need three changes to convert the recipe. Here are the details.
Change the flavor from green tea to lemon.
- Remove green tea from the recipe.
- Add the zest of one whole lemon to the egg yolk batter.
- Substitute part of the water with fresh lemon juice.
Changes in making the meringue
- Remove cream of tartar from the recipe. Substitute it with two teaspoons of lemon juice. Cream of tartar is not required since lemon juice is acidic which can stabilize the meringue.
Changes to make the texture more cottony, softer and ensure there are no large holes.
- Increase the amount of baking powder from half to 3/4 teaspoon. I increase the amount of flour to 100g since the chiffon cake deflates marginally. Cake with a higher amount of flour has a stronger structure.
- Increase the amount of water and juice slightly.
- Add half an egg white to make the cake lighter.
- Add a small amount of salt to balance the sweetness and the sourness of the cake.
Wow! The whole recipe looks different now.
So here’s how the Lemon Chiffon Cake recipe looks like:
Ingredients A (the yolk mixture)
3 egg yolks, about 50g
25g castor sugar
50g corn oil
25g of fresh lemon juice, about 5 teaspoons
35g of water
1 tablespoons of lemon zest
Ingredients B (the dry ingredients)
100g of cake flour
1g of salt, about slightly less than 1/4 teaspoon
3g of baking powder, which is 3/4 teaspoon
Ingredients C (meringue)
3 1/2 egg whites, about 100g
45g of castor sugar
10g of fresh lemon juice, about 2 teaspoons
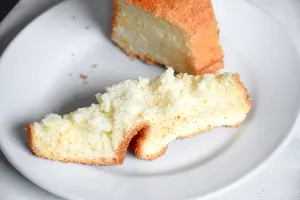
The cake turns out to be cottony, and with no visible holes. The cake has better volume, and more spongy than the green tea chiffon cake recipe.

florence
Saturday 26th of December 2020
Thank you Mr Kwan. I tried your green tea chiffon cake recipe after watching your very clearly explained video and to my surprise I baked an excellent cake the first time I tried. Appreciate your kind sharing. May I know do you have a video or recipe to bake gula melaka pandan chiffon cake? Merry Christmas and A Happy and Prosperous 2021 to you.
KP Kwan
Sunday 27th of December 2020
You are welcome, Florence. I do not have the recipe you requested, but I will put it in mind for my future baking. Have a wonderful year ahead. KP Kwan
ashok
Friday 18th of December 2020
Guys, Thanks For sharing this Great Recipe. My Family Loved it. I am definitely sharing this recipe and this website with my friend. Hope they also love it. Thank you again for sharing such a great recipe.
KP Kwan
Friday 18th of December 2020
Hi Ashok, It is my pleasure to share and great to know that you like it. KP Kwan
Camila
Saturday 14th of November 2020
Good Morning KP Kwan,
I really enjoy your recipe and I'm so thankful to you for sharing it with everyone! I wish you success in all your projects! and I would keep tuned to your YouTube channel. Do you have a variation of this chiffon using fruits?
KP Kwan
Sunday 15th of November 2020
Hi Camila, I do not have one with fruits fo far, but will keep in mind when I make my cake in the future :) KP Kwan
chin
Sunday 1st of November 2020
Hi kp kwan,
I would like to try baking chiffon cake. but i dont have green tea.. can i make vanilla chiffon for this recipe instead? What adjustments should i make? my pan is 9" tube pan
KP Kwan
Monday 2nd of November 2020
Hi Chin, I suggest you omit the green tea and add the vanilla extract without making any changes to the remaining ingredients. Thanks.
lisa
Thursday 30th of July 2020
hi KP Kwan, I tried your matcha chiffon cake & it turns out great! May I know if I can convert it to a chocalte chiffon cake? Thanks a lot
KP Kwan
Friday 31st of July 2020
Hi Lisa, My concern is the volume of matcha is small compare to chocolate. The changes will kick the ratio of other ingredients off-balanced. You can try, but I can't assure you the result without testing it. KP Kwan