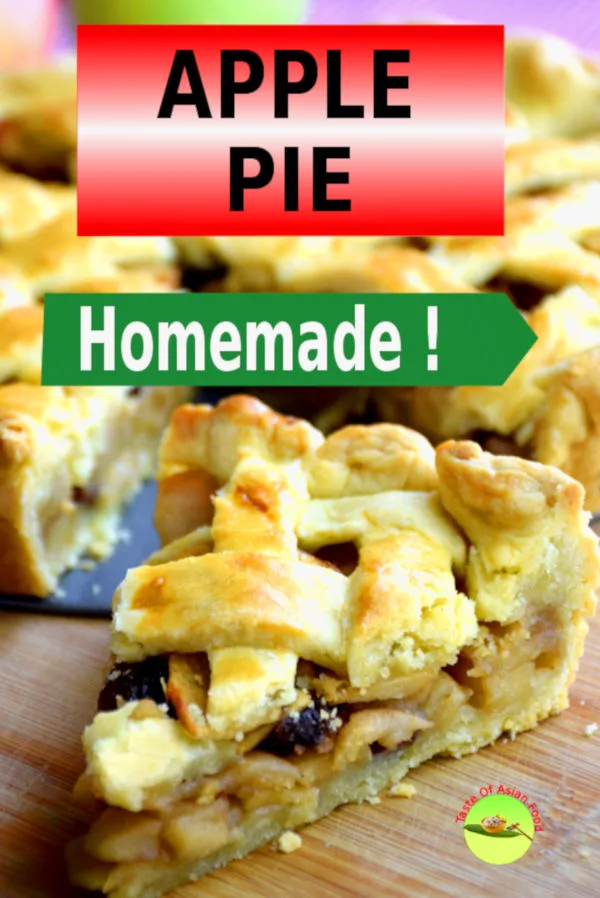
I want to share my time-tested homemade apple pie recipe with you.
This recipe delivers a delicate balance of flavor and texture, which make every bite blissful. The pie crust is flaky and buttery, and the filling is gooey, sweet and yet still has some slight crunch apple pieces.
Homemade apple pie will never go wrong when you tell your guests that you have it for dessert. It has a universal appeal and whetted the appetite for everyone. You will not be disappointed.
But before jumping straight into the recipe, I have summed up what I learn from my mistakes so far, and offer ten useful tips on how to make the better apple pie. You can use it as the checklist whenever you run into problems, and hopefully one of the tips will be your savior.
Note: This post may contain affiliate links. Please read my privacy policy for more info. I may receive commissions for purchases made through links in this post.


Ten useful tips on how to make apple pie
One of the following tips will be useful whenever you run into trouble when baking your homemade apple pie.
1. The shortcrust pastry is not flaky enough
The formation of gluten is the most common reason why the pie crust does not turn out flaky and crumbly. This problem can be reduced by keeping the temperature low, don not kneading the dough excessively, use just enough water to form the dough, and use flour with lower gluten content.
Keep the temperature low. Gluten will form when two proteins called glutenin and gliadin is combined. The lower the temperature, the slower this process will progress. Therefore, using cold butter cubes and ice water in the process of making the dough is an important step. Some purists even refrigerate the flour and the mixing bowl before combing with the butter.
Use just enough water to form the dough. The formation of gluten required water. Therefore, it is a good practice to add water a little at a time until it is just enough to form the dough that is lumpy but no longer crumbly. You MAY NOT need all the ice water as indicated in the recipe. Add the ice water to the flour and butter mixture slowly. Stop adding when the mixture can combine into a dough and moist enough to form an elastic dough. Discard the remaining water if there is any excess.
Do not overwork the dough. Excessive kneading of the dough risking the formation of more gluten which results in a more bread-like texture. You need to inhibit the development of gluten if you want tender crust and crumbly finish. Stop kneading the dough when it forms an elastic ball. It is Ok that there are still some pieces of butter in between the flour, as it helps to create flaky layers during baking.
Choose a low gluten flour. Regular flour contains lower gluten (6-8%) than bread flour. (12-14%). Always use the flour with low gluten level for this recipe.
2. The apple pie crust is soggy at the bottom
You can fix this issue by using the following method.
- Although there is no consensus on how to make the apple pie filling, I prefer to cook the apple filling before baking. Apple will release water during baking. Cook down the apples with the sugar, and drain off the excess liquid by putting the filling in a colander. This method will remove the excess liquid and avoid excessive apple juice from wetting the pastry during baking.
- The bottom crust can get soggy if the oven is not hot enough. You can put the pie close to the bottom or increase the temperature of the bottom heat of the oven.
3. The pie crust tastes bland
Always season the pastry pie crust with salt and sugar. Sometimes we might forget to add salt and only realized that the butter that we used is the unsalted butter. Add some sugar to the pastry if you are making apple pie or other sweet pies.
You can make the pie crust from scratch with butter, margarine, shortening or lard. While shortening and lard are easier to handle, nothing can beat the flavor of butter. Besides, the steam that releases from the butter helps to create a flakier crust.
The flavor of pie crust made with butter is far better than those with margarine and shortening. Also, you can increase the amount of butter to get a lighter and richer pie crust.
4. The dough turns out too sticky by following to the recipe
We tend to add too much water while making pie dough because of the habit of following the amount in the recipe. However, the ice water required is one thing that depends on the humidity. Stop adding water once you can form the dough that is stretchy and no longer crumbly.
5. My pastry shrinks
If you find that the pastry shrinks after rolling out, be patient! Keep it back to the refrigerator to let it relax for half an hour before roll it out again.
The pastry needs time to relax after kneading. That is why we always chill it in the fridge. Relaxed gluten is more likely to hold its shape after baking.
Do not stretch the pastry while rolling it out. Lower the pastry into the pan and let it takes the shape of the pie pan. Dough that is forced to take the form of the pie pan will pull back to the original shape once baked.
The shrinking can also cause by kneading the dough for too long and forming too much gluten. Do not overwork the dough unnecessarily.

6. The pie burn at the edge
The edge of your homemade apple pie will turn color faster than the surface. Cover the edge with aluminum foil during baking can solve this problem. I find that the best result is to remove the aluminum foil after half an hour of baking, and then continue for another fifteen minutes. The color of the edge and the surface of the pie will be just about the same.
The same method is also used to cover the tip of the chicken wings while roasting chicken to prevent it from turning color too fast.
7. The pie is either under (or over) bake
There are times when you follow religiously to a tested recipe, but the pie is still either over or underbaked. This problem happens to all baking items.
The problem does not lie on the recipe. It is because of the behavior of every oven is different.
The distance and position of the heating element to the pie, and whether the fan is turned on will drastically affect the outcome. The accuracy of the temperature control of the oven is yet another source of the problem. I have two ovens of the same model, but the actual internal temperature is about ten degrees different, confirmed by using an external thermometer.
You need to do some testing each time you use a new oven to get the best result.
8. The pie looks concave/ sink at the center
Insufficient pie filling seems like an apparent reason, but we might overlook it when we pile the apple pieces onto the pie crust. The apple pieces will become soft and unable to hold its original shape during baking. Pat down the apple pieces to make it more compact can avoid this from happening. You can load in much more apple filing than you thought initially by doing so.
9. I got a pie with a hard/compact bottom crust
If the bottom crust is hard and compact, but the sides and the top are flaky and light, it may be due to the hot filling that you use.
Do not rush. Hot pie filling won’t work! The heat from the filling can melt the butter inside the bottom crust. Once this happens, the butter pieces will no longer separate the layers of flour that contribute to the flakiness of the pie crust.
10. (Bonus tip) Frozen your pie before baking
Believe it or not, baking your homemade apple pie directly from the freezer will yield a more falky pie.
The cold butter in the pie dough will expand rapidly due to the vast difference of the initial temperature and the oven temperature. The expansion will increase the volume rapidly and result in a flaky pie crust.
Homemade Apple Pie recipe (for an 8-inch round pan)
This is the easy homemade apple pie recipe that stands the test of time, and incredibly delicious.
It delivers a balance of flavor and texture, best to serve with ice cream and but is good to be on its own.


Homemade Apple Pie
This homemade apple pie recipe delivers a delicate balance of flavor and texture, which make every bite blissful. The pie crust is flaky and buttery, and the filling is gooey, sweet and yet still has some slight crunch pieces.
Ingredients
For the pie crust:
- 250g flour (2cups)
- 1 teaspoon salt
- 3 teaspoon caster sugar
- 150g butter (cold)
- 7 tablespoons (105ml) ice water (approx.)
Filling:
- 700g (7 medium sizes) of apple (mix of green and red), weight before cutting)
- 100g of caster sugar
- 50g of brown sugar
- 1 tablespoon of cornstarch
- 1/2 teaspoon of salt
- 1 teaspoon of cinnamon
- 1/4 teaspoon of nutmeg
- 1 tablespoon of butter
- 30g raisin
Instructions
For the pie crust:
- Mix the flour and salt in a bowl.
- Add the cold, cubed butter to the flour. Use clean hand to break up the butter until it resembles breadcrumbs.
- Add the ice water gradually and continue mixing the dough until it starts to lump together but not crumbly.
- Work the dough to form a ball. Wrap it with clip film and refrigerate for thirty minutes.
For the filling:
- Peel the apples, cored and cut into thin slices.
- Combine the apple slices, sugar, salt, cinnamon, and nutmeg.
- Cook down the apple over low heat for five to eight minutes until the apple slices are soft.
- Add the butter, then cornstarch to thicken the apple filling.
- Transfer it to a colander and dripped away any excess liquid.
To assemble the pie:
- Put the pie dough on a floured surface, cut into half.
- Roll out both halves to a round shape, about half an inch larger than the pie pan.
- Trim off the extra dough from the edges.
- Fold the first dough to quarter. Transfer it carefully and press it lightly against the pie pan.
- Pour the apple filling into the pan and pat down.
- Roll out the second dough. Cut it into 1/2 inch wide strips. Put it on top of the pie filling to form a lattice.
- Trim off the excess dough, about half an inch from the edges.
- Fold the edges of the top and bottom crust underneath itself, creating a thicker border that rests on the edge.
- Crimp the edges.
To bake the pie:
- Brush the top crust with beaten egg.
- Line the crimped edges with some strips of aluminum foil.
- Bake for 30 minutes at 175°C/350°F top and bottom temperature. Remove the aluminum foilt
- Bake for another 15 minutes or until the crust is golden brown. Serve.
Notes
If you encounter any audio / visual problem of viewing this video, you can view it from YouTube by clicking this link, which will open in a new tab.
Recommended Products
As an Amazon Associate and member of other affiliate programs, I earn from qualifying purchases.
-
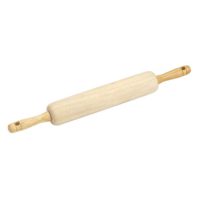
 GoodCook Classic Wooden Rolling Pin with easy roll bearings
 -
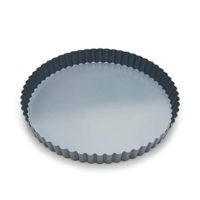
 Fox Run 44513 Round Loose Bottom Quiche Pan, 9-Inch, Preferred Non-Stick
 -

 Jumbo Seedless Medley Raisins - 3 15oz. Canisters
 -

 McCormick Ground Cinnamon Powder (Sweet Holiday Spice), 18 oz
 -

 Simply Organic Nutmeg Ground CERTIFIED ORGANIC 2.3oz. bottle
 -

 Reynolds Kitchens Quick Cut Plastic Wrap - 250 Square Foot Roll
Nutrition Information:
Yield: 6 Serving Size: 1Amount Per Serving: Calories: 519Total Fat: 23gSaturated Fat: 14gTrans Fat: 1gUnsaturated Fat: 7gCholesterol: 59mgSodium: 710mgCarbohydrates: 76gFiber: 4gSugar: 39gProtein: 5g
This data was provided and calculated by Nutritionix on 3/11/2019
Lisa
Thursday 20th of October 2022
You never provided what temp to set the oven to ...
KP Kwan
Friday 21st of October 2022
It should bake for 30 minutes at 175°C/350°F top and bottom temperatures. Remove the aluminum foil. I have added this info to the recipe,
Sajida
Sunday 20th of September 2020
Shortning is a ghee or preheat ghee and then put it into the freezer I am use in apple pie crust for knead it Regard Sajida
KP Kwan
Tuesday 12th of March 2019
Hi, this is KP Kwan. I am happy to see you in this comment area, as you have read through my recipe. I am glad to reply to any questions and comments as soon as possible.