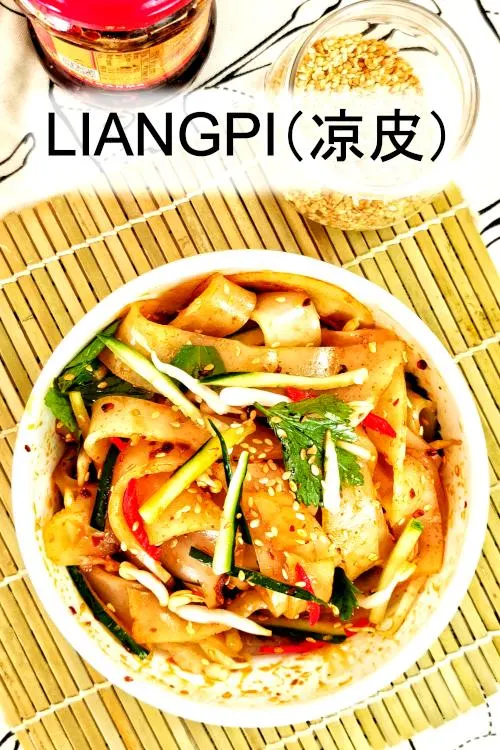
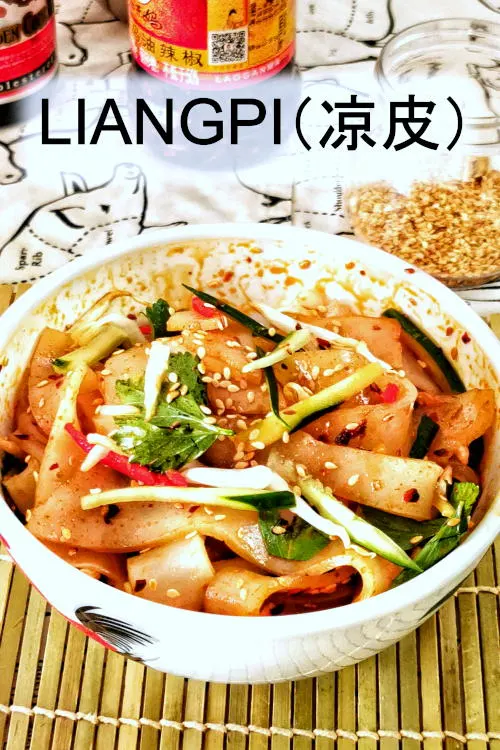
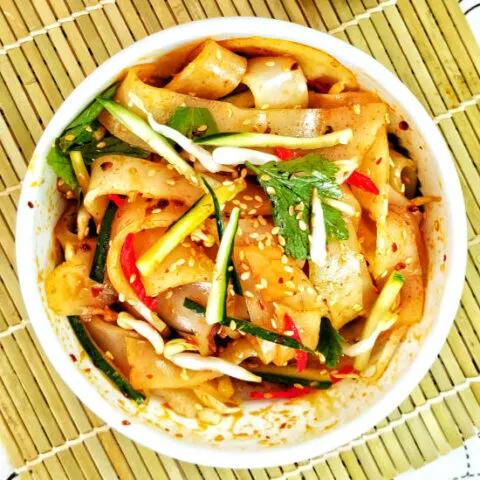
Liangpi (cold skin noodles) is a popular noodle dish from northwest China, commonly served cold, unlike other hot noodles dishes.
Liangpi has a unique slippery and springy texture. It is absolutely delicious when dressed with a spicy sauce made with chili oil and black vinegar and served with sesame seeds, crunchy cucumbers, and bean sprouts.
What is liangpi
Liangpi means ‘cold skin / 凉皮) in Chinese. The name is spot on to describe these noodles as the sheet of semi-translucent noodles ‘skin’ is cool immediately over a pot of cold water and served cold. It is also gluten-free, ideal for gluten intolerant people.
Note: This post may contain affiliate links. Please read my privacy policy for more info. I may receive commissions for purchases made through links in this post. As an Amazon Associate, I earn from qualifying purchases.
Let’s get into the details of how to prepare liangpi.

How to get the starchy water for making liangpi
You can make this cold Chinese dish using the starchy water left from making seitan after washing the wheat flour several times. Please refer to my previous article on using the ‘wash the flour’ method to make seitan, a.k.a. mock meat. The starchy water after washing the flour is kept for this recipe to make liangpi.
Part 1: Prepare the liangpi from the starchy water
This article is a continuation of what was left behind after washing the flour with plenty of water while making seitan, the vegan meat. You can check out this article on making the seitan. I kept the starchy water to make liangpi. In other words, nothing is wasted.
I kept the starchy water for half a day or longer to let the starch precipitate, then used it to constitute the batter for making liangpi.
Let’s get into the steps right in.
- After keeping it for half a day, the starch has already sunk to the bottom. So carefully pour away as much water as possible on the top layer.
- Stir to loosen the starch that sinks to the bottom. Since the starch is too thick to use as the batter for making liangpi, I need to add more water to form a batter with the right consistency. I added 200ml of cold water to 400g of the starch (which drains away all the water from washing the flour). Please refer to my seitan article to prepare the starchy water, which will also produce the seitan simultaneously.
- Filter the batter through a wire mesh strainer to remove any lumps.
- Apply some oil to the surface of a shallow pan, preferably a nonstick cake pan.
- Add the starch batter just sufficient to fill the pan and form a thin layer.
- Bring the water in the wok to a boil. Place a trivet in the wok and carefully adjust to ensure it is level.
- Place the pan on the trivet, cover, and steam for two minutes over high heat.
- Remove the cooked liangpi immediately and transfer it to a cold water bath to cool it quickly.
- Apply some oil to the surface while cooling.
- When it is cold, lift the liangpi carefully, then place it on a cutting board.
- Cut the sheet of cold noodles with a sharp knife or dough cutter into 1.5cm wide noodles.
That is easy, albeit you need to prepare the starchy water. However, it is worth the effort because you have the liangpi and the vegan chicken made with the seitan!

Tips to make a better liangpi
I have made liangpi several times and want to share my experience:
- Keep the starchy water for the first three washes when washing the flour. The starch content from the subsequent washes is not worth keeping as it has too little starch.
- You have to keep the starchy water for at least half a day before removing the excess water on the top layer. I kept it in the refrigerator for two full days before making liangpi, and the quality is as good as using it on the same day.
- It is hard to tell exactly how much water is supposed to add to the precipitated starch to make a batter with ideal consistency. I add 100ml of water to 200ml of the starch precipitate, which yields a reasonably good texture. I suggest using a more conservative approach by adding slightly less water and making one first to see the texture produced by that consistency. You can then add slightly more water if you want the texture to be silkier and softer.
- The amount of batter for each noodle sheet also plays a part in the mouthfeel. I use one and a half ladles for my 8’x8′ square pan to produce the perfect thickness. You need to try one sheet to see the result. Ideally, it should be around 1/8 of an inch.
- It is OK not to place the cooked liangpi into the cold water bath. It makes it cool faster, so you don’t need to wait too long before removing the noodle and using the pan for the next noodle sheet. Also, it works much faster if you have two identical pans to work with.
- Please oil the pan even if you use a non-stick pan because the batter is very sticky. Also, do not forget to brush some oil on the surface because you need to fold the noodle sheet while cutting it. They will stick together if you do not oil them enough.
- Stir the batter each time before fill-up the ladle, as the starch can settle quickly to the bottom.
- The proper way to steam the liangpi is to use high heat. Otherwise, it may not be fully cooked and become sticky after steaming for two minutes. On the other hand, low heat can cause the noodle sheet to crack.
- The traditional way to steam liangpi is by placing the pan directly on the water’s surface without using a trivet. However, I find that I can control the level of the pan better by placing it on the trivet. Since the noodle sheet is relatively thin, you need to make it level to produce a sheet of noodles with equal thickness throughout.
Part 2. How to serve liangpi
The liangpi is served cold, with a sauce made with chili oil, black vinegar, light soy sauce, and sesame oil. Besides that, bean sprouts, julienned cucumber, mock meat, sesame seeds, crushed peanuts, and cut chilies are the typical ingredients to make up the complete noodle dish.
The components of the sauce and the condiments are different in various regions. Therefore, what I use in the recipe is only my preference, closely resembling those famous in the Shaanxi province. (Disclaimer: I live in Kuala Lumpur, Malaysia.).
The rule of thumb is to include ingredients with crunchy and contrasting texture, and the sauce should have a strong favor as the noodles are neutral in flavor.
The sauce is made by combining all the ingredients in a bowl and mixing well. There is no need to cook or boil it, but I suggest using castor sugar instead of granulated sugar since it can dissolve easily.
Other helpful information about liangpi
How to keep liangpi
You can stack up the liangpi after steaming but make sure they are properly oiled to prevent them from sticking together. I suggest keeping the stack of liangpi in a container and covering it to prevent drying.
Liangpi is not nice to eat if you keep it overnight, which will become brittle. Therefore, it is best to make a small amount to serve on the same day. As I mentioned earlier, you can keep the raw starch water in the refrigerator for a few days and make more liangpi when required.
Other types of liangpi
There are numerous types of liangpi in China, which are made with wheat starch or rice flour, potato starch, and mungbean starch. Some are served hot, and others are served cold, with different accompanying sauces and condiments.
This recipe is based on the popular version served in the Shaanxi restaurant near me, which is served cold, made by washing the wheat flour, and dressed in chili and vinegar-based sauce.

Liangpi (凉皮 / spicy ‘cold skin’ noodles) - How to make it at home
Liangpi (cold skin noodles) is a popular noodle dish from northwest China, commonly served cold, unlike other hot noodles dishes. It has a unique slippery and springy texture.
Liangpi is absolutely delicious when dressed with a spicy concoction of chili oil, black vinegar, sesame seeds, crunchy cucumbers, and bean sprouts.
Ingredients
The liangpi
- 400g thick starch precipitant (from making seitan)
- 200ml water
- 1/2 tsp salt
The sauce
- 2 tbsp chili oil
- 1.5 tbsp black vinegar
- 2 tbsp light soy sauce
- 1tsp sesame oil
- 1/2 tsp castor sugar
- 1/2 tsp cornstarch
- 2 tsp chopped garlic
The topping
- 1 cup bean sprouts
- 1/4 cup coriander (cilantro) leaves
- 50g mock chicken meat
- 1/2 cucumber (julienned)
- 1 tbsp toasted sesame seeds
- 1 red chili, cut into thin slices
Instructions
The liangpi
- Carefully pour away as much water as possible on the top layer the starchy water that has been kept for half a day,
- Stir to loosen the starch that sinks to the bottom.
- Add 200ml of cold water to 400g of the starch slurry to form a batter.
- Filter the batter through a wire mesh strainer to remove any lumps.
- Apply some oil on the surface of a shallow pan, preferably a nonstick pan.
- Add the starch water sufficient to fill the pan and form a thin layer.
- Bring the water in the wok to a boil.
- Steam the batter for two minutes over high heat.
- Remove the cooked liangpi immediately and transfer it to a cold bath..
- Apply some oil to the surface of the liangpi while cooling.
- When it is cold, lift the liangpi carefully, and cut it into 1.5cm wide strips.
The sauce and other ingredients
- Mix all ingredients for the dressing in a bowl.
- Place the liangpi in the serving bowl, drizzle the dressing on it, and serve with beansprouts, coriander leaves, mock meat, cucumber, and toasted sesame seeds.
Recommended Products
As an Amazon Associate and member of other affiliate programs, I earn from qualifying purchases.
Nutrition Information:
Yield: 3 Serving Size: 1Amount Per Serving: Calories: 355Total Fat: 24gSaturated Fat: 6gTrans Fat: 0gUnsaturated Fat: 15gCholesterol: 48mgSodium: 1794mgCarbohydrates: 16gFiber: 2gSugar: 4gProtein: 19g
This data was provided and calculated by Nutritionix on 11/5/2022


KP Kwan
Friday 13th of May 2022
Hi, this is KP Kwan. I am happy to see you in this comment area, as you have read through my recipe. I am glad to reply to any questions and comments as soon as possible.