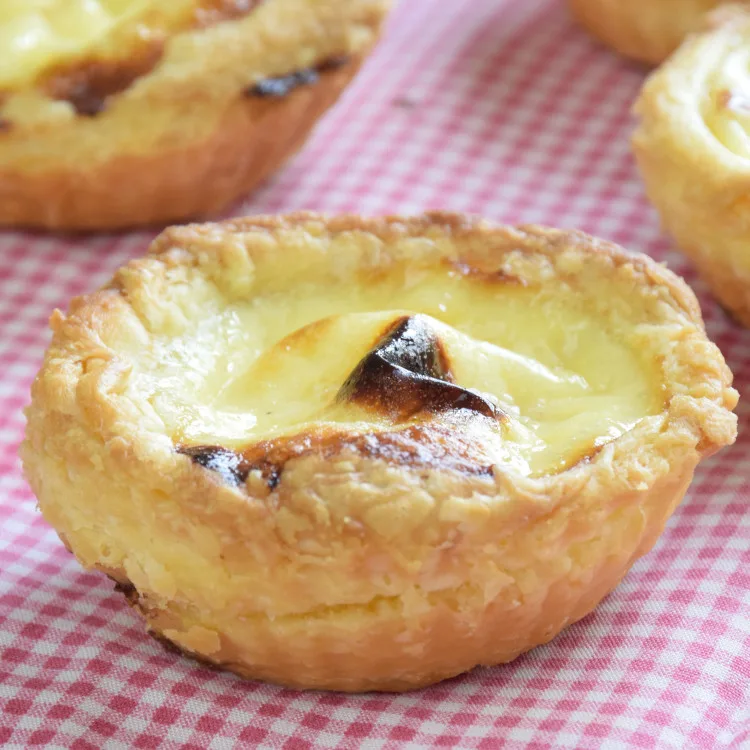
This article is about how to make Portuguese tart, the Asian way.
I said the ‘Asian way’ because I have not been to Portuguese to taste the authentic Portuguese tart, Pastéis de Nata as it is called. I am presenting the version which is the widely available dessert on the menu of many Chinese cafes (茶餐厅), particularly in Hong Kong and Taiwan.
Portugal has stamped its mark in Asia by conquering many regions, including where I live, i.e. Malaysia in 1511 and subsequently settled in Macau in the 16th century. So we have Portuguese grilled fish, pineapple prawn curry savor by the Portuguese descendant in Malacca. Of course, with the over 400 years of cultural influence, you can’t miss savoring the Macau Portuguese egg tarts based on the authentic Portuguese pastel de nata if you ever visit Macau.
Note: This post may contain affiliate links. Please read my privacy policy for more info. I may receive commissions for purchases made through links in this post.

Why should you make the puff pastry yourself?
Use only puff pastry for Portuguese tart, not shortcrust pastry. There is no short cut.
This recipe can be a little intimidating for certain people because making the puff pastry can be challenging. There are two options. The shortcut is to buy the ready-made puff pastry and skip all the rolling and folding. Jump straight to the step of rolling up the piece of pastry like making the Swiss roll. If you do so, you probably can cut the time of preparing the Portuguese tarts by half.
However, most of the puff pastries available at where I live are prepared with shortening, not butter. These pastries are far inferior to any puff pastry that makes with pure butter.
There is a considerable difference of taste between the two. Butter has a melt-in-the-mouth quality. As for the shortening, it will congeal and coat the inside of the mouth to give an unpleasant taste.
If you are meticulous about the quality like me, take the option to make the puff pastry yourself.
Let’s get started!
I am giving as much information as I can to make it clear and straightforward. I hope it will be useful for the first-timers. However, you can skip some of the paragraphs if you are a seasoned baker, or even can show me more tips to perfect the recipe by leaving your comment at the end of this article.
Before you begin, take a look of the recipe (near to the end of this article) and then read through the list of tips I have written right below 🙂
Why is puff pastry can rise without using yeast and baking powder?
Puff pastry is one of the most fantastic invention in baking. When the pastry is heated up, the steam trap in the layers is expanded and responsible for its spectacular rising power.
There is a slight difference between the western puff pastry and the Chinese puff pastry for making traditional Dim Sum like Chinese egg tarts and Siu Bao.
The western version is made with an equal portion of flour and butter, whereas the Chinese version for Dim Sum contains a smaller amount of oil. Some pastry shops use lard instead of butter, perhaps that’s due to the Chinese consume fewer dairy products in general.
The most frustrating part of making puff pastry is it can get messy, with flour scatter everywhere and butter oozing out from the dough while rolling. The following tips are useful to keep the mess to the minimum so you can enjoy preparing your lovely Portuguese tarts.
Watch this video (below the instruction of the recipe)
A picture worth a thousand words, a video worth a thousand images.
This video will show you how to prepare the Malaysian style Tomato Rice. (8.47 minutes). It is located below the Instruction, above the nutrition value in the recipe below.
(Note: If you encounter any audio / visual problem of viewing this video, you can view it from YouTube by clicking this link, which will open in a new tab)
Tips to make the puff pastry for the Portuguese tarts
Making the puff pastry requires some practice, but it is worth the time you spend once you cut the pastry to review hundreds of layers that you created with your time and patience.
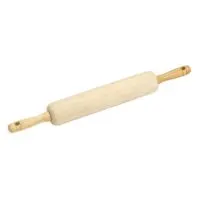
- Use a plastic sheet to wrap the dough. The dough tends to stick less on a plastic sheet. Shape the dough into a rectangle by placing the dough on a plastic sheet. Wrap and fold the plastic sheet to form a rectangle. Then use the rolling pin to roll out the dough. The dough will take the shape of the rectangle.
- Chill the dough before rolling out into a rectangle sheet. Rolling a soft dough is hard because the pressure of the rolling pin may break the dough, causing the butter to leak out and make the work very messy. The solution: Chill the dough until it is firm enough, that is when the butter is firm enough but slightly short from too hard to fold the pastry. If you ever break the layer of pastry at this point, do a quick ‘repair’ by adding a sufficient amount of flour to cover the leakage at once.
- Add some flour to the butter dough. It helps to harden the butter a bit so that it is easier to handle. I find that adding 15g of regular flour to 100g of butter is sufficient to bind the butter well.
- Use shortening. You can choose not to add flour if you are using shortening. Shortening is not as hard as butter and does not melt easily at warm temperature. Therefore it is very much easier as it is not as hard as butter when refrigerated, and not melt quickly at room temperature. Shortening is also cheaper than butter. The only disadvantage is that it does not taste as good as butter.
- Dust the pastry with flour. Using a sieve to distribute the flour evenly onto the pastry. I also like to dust the working surface large enough to place two rolled-out dough. I will roll out the dough on the left side of the dusted surface, and transfer the rolled out dough to the other side when I feel that the dough tend to stick on the surface.
- Brush the excess flour on the pasty away with a brush.
- Roll out the pastry with short strokes. Short strokes work better because it will not break the layers. You can also use your fingers to shape the dough instead of wholly relies on the rolling pin.
- Turn the dough 90 degrees for the subsequent rolling. This step must be taken before each rolling-out, so the gluten is stretched in all directions, not just lengthwise. Failure to do this results in products that deform or unevenly shrink when they bake.
- Do not rush. Make sure the dough is and cold before rolled and cut. The layers will stick together if it is too soft, preventing it from rising properly.

Tips to prepare the Portuguese tart custard filling
- Use a sufficient amount of egg. An adequate amount of egg is essential to form the body of the filling. The protein of the egg will congeal when heated up, much like making any custard. Egg gives a natural yellow color to the filling. I use additional egg yolk in this recipe to give it a bright yellow.
- Use cornflour. Cornflour helps to set the custard and prevent it from collapse. If you happen to have a batch of egg tarts with collapse filling, chances are that the amount of cornflour is insufficient.
- Cook the milk mixture until it can lightly coat the surface of the metal spoon. The milk mixture will start to thicken when it is cooked with cornflour. Anything fall short than that may cause the custard unstable and potentially separate into two layers.
- Filter the custard filling before pouring into the mold. This step is to remove any lumps that might form while heating the cornflour, sugar, and milk.
- Add cinnamon stick and lemon zest. You can add a stick of cinnamon or lemon zest into the milk while cooking. It all depends on what flavor you want to add. I am keeping the recipe simple and did not include any of these optional items.
- Add some vanilla essence. Vanilla is great for Portuguese tart, but it is hard to get pure vanilla in Malaysia There is artificial vanilla essence available which tastes awful. Therefore I did not add the artificial vanilla to my custard. It is a welcome addition if you can get the natural vanilla.

Tips for baking the Portuguese egg tart
- Bake at heat temperature. The most challenging part of baking the Portuguese tart is to get the right temperatures to produce the partially charring surface and yet does not incinerate the pastry! Preheat the oven to 250°C/480°F and bake for 15 to 18 minutes. This is only a guideline as there are no two ovens behave the same, even of the same model.
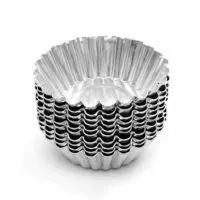
- Use an aluminum mold. Aluminum molds are one of the best heat conductors and are suitable for Portuguese tarts which required high heat for a short time.
- Place on a medium rack. If you cannot adjust the rack position, put the tray on an inverted cake pan so that the surface of the custard is closer to the upper heat source. The surface of the Portuguese tart will brown quickly before the pastry gets burnt and charred.
- Keep an eye on the tarts in the last few minutes. The pastry and the custard will turn color quickly at this point due to the high heat. You may need 18 minutes, but there will be +/- two to three minutes depending on the oven you use.
The Portuguese Tart Recipe

Portuguese tart recipe
This recipe is about how to make Portuguese tart, the Asian way.
I said the ‘Asian way’ because I have not been to Portuguese to taste the authentic Portuguese tart, Pastéis de Nata as it is called. I am presenting the version which is the widely available dessert on the menu of many Chinese cafes (茶餐厅), particularly in Hong Kong and Taiwan.
Ingredients
For the water dough:
- 100g flour
- 15g butter
- 1/4 tsp salt
- 55ml cold water
For the butter dough:
- 100g butter
- 15g flour
For the filling:
- Half an egg
- 1 egg yolk
- 50g sugar
- 1 tbsp of cornflour
- 200ml milk
- cinnamon stick (optional)
Topping: (optional)
Instructions
Water dough
- Place the flour and butter in a mixing bowl. Mix until well blended.
- Dissolve the salt in the cold water.
- Add the salted water to the flour and until a soft dough forms. Do not over-mix.
- Rest in the refrigerator for 20 minutes.
- After 20 minutes, dust the bench lightly with flour. Roll the dough to a rectangle about three times longer than its width and about 1⁄2 inches (1–1.5 cm) thick. Make the corners as square as possible.
Butter dough
- Cream the butter and flour in another bowl until neither too hard nor too soft.
- Put the butter dough on a plastic sheet. Fold the plastic sheet to a rectangle. Roll the butter into the dough to take the shape of the wrapping.
- Place the butter on the water dough.
- Fold the third without fat over the center third.
- Fold the remaining third on top. Fold all ends and corners evenly and squarely. Keep it in the refrigerator if it is too soft.
- Turn the dough 90 degrees on the bench, so the length becomes the width. Before rolling, beat the dough lightly, so the butter is evenly distributed. Roll the dough into a rectangle. Make sure the corners are square.
- Brush the excess flour from the top of the dough.
- Fold the top edge of the dough to the center. Make sure the corners are square and even. Again brush off excess flour.
- Fold the bottom edge to the center. Fold the dough in half like closing a book.
- Give the dough another three folds. And keep the dough in the refrigerator between each fold until it is firm enough to handle.
- After the last roll-out, roll up the dough like making a Swiss roll, keep it in the refrigerator again, and it is now ready to use it for the Portuguese tarts.
For the fillings
- Mix the milk, cornflour, and sugar until smooth. Stir over low-medium heat until the sugar is melted and the mix starts to become thick enough to coat thinly on a metal spoon.
- Add a small portion of the milk to the beaten egg slowly, Then add it back to the bulk of the milk.
- Go through a strainer to remove any impurity.
Molding
- Cut the pastry crosswise into sections about 25 g each. Press the stud of the pastry with your palm. Press down to flatten it to form a disc. Place it into the mold (I use the mold with 7cm in diameter). And use the finger to shape it.
- Rest the make-up mold for 30 minutes in the refrigerator before baking to let the gluten to relax. This step will help to prevent the pastry from shrinking.
Fill up the tart molds and baking
- Fill the egg liquid to about 75% full. Do not let the egg run down the edges as it will cause the pastry to stick onto the mold after baking.
- Preheat oven to 250°C/480°F. Bake for 16 to 18 minutes.
- Check out the doneness during the last two minutes to ensure the tops of the custard get the hallmark black splodges.
Recommended Products
As an Amazon Associate and member of other affiliate programs, I earn from qualifying purchases.
Nutrition Information:
Yield: 12 Serving Size: 1Amount Per Serving: Calories: 176Total Fat: 9gSaturated Fat: 5gTrans Fat: 0gUnsaturated Fat: 3gCholesterol: 45mgSodium: 123mgCarbohydrates: 23gFiber: 0gSugar: 14gProtein: 2g
This data was provided and calculated by Nutritionix on 1/6/2019


Joyce
Monday 7th of January 2019
Hi KP, Thank you very much for the tips and recipe. I've been wanting to make this for some time now but find it intimidating. I will make this and let you know how it turned out. Also, do you think it's possible to use duck egg to make this?
KP Kwan
Wednesday 9th of January 2019
Hi Joyce, Thanks for your interest in this Portuguese tart recipe. Should have no problem to use duck egg instead of chicken egg. Hope it turns out well KP Kwan
DERRI HENRY
Sunday 6th of January 2019
I DO NOT LEAVE REPLY OR COMMENTS BUT I NEEDED YOU TO KNOW .... KP WAN I APPRECIATE YOU THANK YOU FOR SHARING SOME INSIGHT IN ANOTHER CULTURE ... THANK YOU
KP Kwan
Wednesday 9th of January 2019
You are welcome. I will do my best to write more tested recipe from Asia!
KP Kwan
Sunday 6th of January 2019
Hi, this is KP Kwan. I am happy to see you in this comment area, as you have read through my recipe. I am glad to reply to any questions and comments as soon as possible.