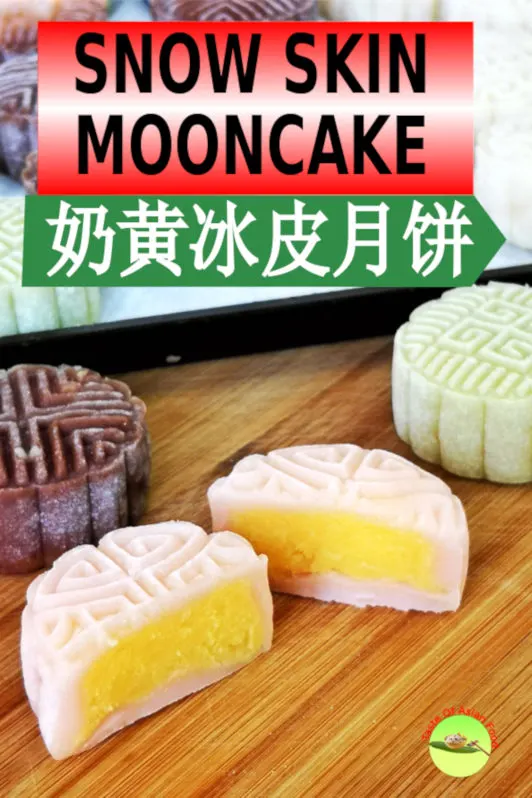
Snow skin mooncake 冰皮月饼 has become a favorite dessert served during the Mid-Autumn festival. It was invented in the 1960s in Hong Kong (some say Singapore) and evolved to the present formula in the late 1980s
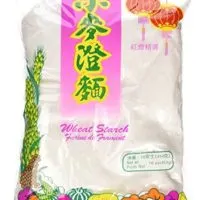
The texture, ingredients, and methods of cooking are entirely different from the traditional mooncake. Snow skin mooncake is made with glutinous rice flour, rice flour, and wheat starch, without golden syrup and lye water.
And, it does not involve baking either.
Note: You can get the complete guide on how to make the traditional mooncake here (those with Chinese pastries and lotus paste). I have just written the recipe not long ago.
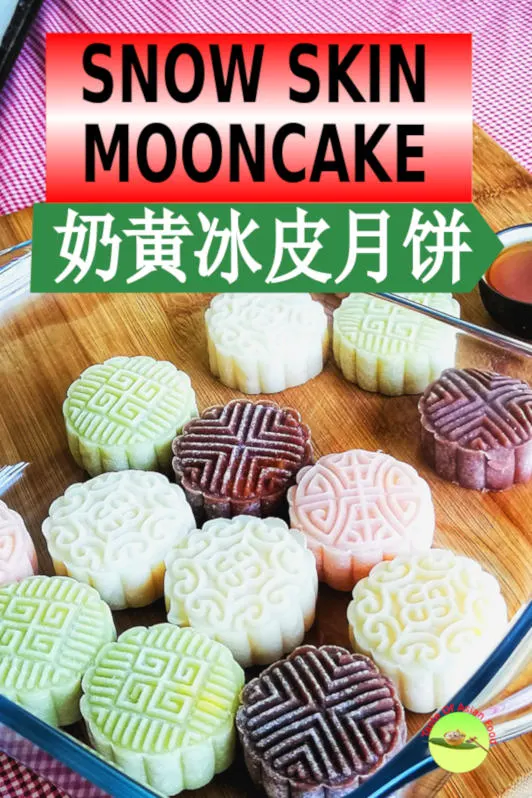
The most significant difference from the traditional mooncake is the appearance. You can make multicolor snow skin mooncakes by adding natural or artificial coloring to the pastry since the base color is white.
There is a vast variety of ingredients used as the filling, ranging from the traditional lotus paste to western-influenced custard, to the vanity filling like durian and even ice-cream! The possibility is beyond our imagination.
I am using custard as the filling, with four different color pastries in this recipe.
Let’s get started.
Note: This post may contain affiliate links. Please read my privacy policy for more info. I may receive commissions for purchases made through links in this post.
Snow skin mooncake is also translated as ice skin mooncake. It is served chilled with a semi-translucent pastry, which is why it is termed ‘Snow Skin’.
How to make snow skin mooncake 奶黄冰皮月饼
1. Make the pastry
I use natural coloring to make mooncakes with four different colors which will take a little longer. You can simplify it by only using one color and saving time if you think it is too troublesome.
Here are the steps:
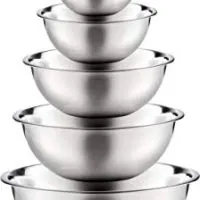
- Sieve the icing sugar, glutinous rice flour, rice flour, wheat starch, and vegetable oil into a stainless steel bowl. You can use corn oil, canola oil, peanut oil, or any other oil with a neutral flavor.
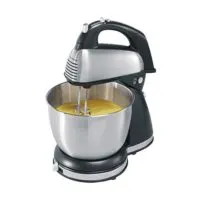
- Add the milk into the flour and sugar to form a batter by mixing it with an electric mixer.
- Once it is well combined, steam the batter over medium heat for twenty minutes or until the flour is fully cooked. (The flour is fully cooked when it is no longer stick to the plastic spatula or wooden chopsticks.)
- After it cools down, place it on a piece of plastic sheet or cling film. Knead it manually for a minute or until it is smooth and shining. You need to use a pair of gloves for kneading as it is very sticky.
- Wrap the dough with cling film and chill it for thirty minutes or longer before proceeding to the next step.
How to make the snow skin with different colors
You can make the snow skin mooncakes with different colors easily by following the additional steps as below:
- Divide the flour and sugar into four portions in separate stainless steel bowls.
- White skin: Prepare the first portion by following the steps as above without adding any color.
- Pink skin: Substitute the milk above with strawberry flavored milk. You can get it easily at the supermarket. Alternatively, you can substitute the milk with dragon fruit juice. If you manage to get dragon fruit, process it with your juicer and use it to make the mooncake. Carrot juice is suitable for red skin.
- Chocolate skin. Add some chocolate powder or cocoa powder. Use the amount enough to color the dough, or add extra if you want more chocolate flavor.
- Green skin. Do the same as the chocolate color dough, but using green tea powder instead of cocoa powder. Alternatively, blend some pandan (screwpine) leaves with the milk, then let it passes through a strainer. The milk is now colored (green) with a pleasant pandan aroma. Use the pandan flavored milk to make the pastry.
2. Making the custard filling
Cream the butter and sugar
- Measure the correct amount of unsalted butter in a large mixing bowl. Let the butter return to room temperature before proceeding to mix with the sugar. Soft butter produces lighter buttercream when mixing with sugar.
- Meanwhile, sieve the icing sugar if it is lumpy. Since icing sugar tends to harden over time, it is advisable to sieve it before adding to the butter for creaming, which traps more air and makes it light and fluffy,
- Once the butter is softened, use the mixing blade of the electric mixer to combine the icing sugar and butter without turning on the mixer. When the butter and icing sugar start to combine, switch on the mixer to cream the butter and sugar.
- Since icing sugar is very light, the rapid action of the mixing blade will cause the powdered sugar to spill out from the mixing bowl. You can avoid this from happening by manually mix it first until most of the sugar has combined with the butter, before switching on the mixer.
- The butter and icing will eventually well-combined, become light and fluffy, and the color will become pale. The creaming process is identical to the steps involved in making butter cake. This process may take one to three minutes depends on the amount of the ingredients and the power of the mixer.
You may use castor sugar in place of icing sugar, but icing sugar results in a smoother texture.
Add the eggs
- When the buttercream turns light and fluffy, add the egg to the mixture and continue mixing.
- The standard practice is to add the egg one after another at this stage. I suggest using one egg first, beat it until it is nearly homogenous before adding the subsequent eggs. This method is useful if we use a less powerful electric mixer at home. However, you can add all the eggs at once if you have a high power mixer. We do that all the time in our cafe with our commercial mixer.
- You may notice that it is hard geta homogenous batter no matter how long you mix it. The imperfect mixing is due to a large number of eggs in this recipe. This result is expected as the buttercream is unable to absorb all the eggs at this stage.
- Once the eggs are well combined with the buttercream, add the milk powder and wheat starch.
- Remove the mixer and use manual mixing to combine all the ingredients until homogenous. The best way is to use a fork for a small amount, or a hand-held kitchen whisk for a larger quantity.
- Scrape the side of the bowl with a plastic scraper to ensure all the flour and milk powder is well combined with the liquid ingredients to form a smooth, lump-free batter.
Note: I suggest to use a stainless steel bowl that can fit into the steamer to cream the sugar and butter. By doing so, you can steam the batter in the stainless bowl directly without pouring it to another steaming bowl. Transfering is messy as the batter is sticky, and you will lose some during transferring.
Steam the custard
- Steam the custard over boiling water, cover for five minutes. Open the lid and scrape the bowl with a metal fork or spatula and stir to ensure even cooking.
- Cover and steam for another three to five minutes, or until the custard starts to thicken. There is no harm to open the lid to check from time to time. Once the custard begins to thicken, stir until it is thick enough that the custard is no longer runny and does not stick to the bowl and the spatula. Check the thickness and remove it once the consistency resembles plasticine.
- You may need to do some trial and error if you are making it for the first time. If you are unsure, cook it over low heat a little longer to make sure that the filling is firm enough as the filling.
- Remove the custard and cover with cling film. Set aside.
3. Cook the glutinous rice flour
Since the dough of the pastry is very sticky, we need to dust the surface with flour before shaping it to prevent it from sticking to the mold.
We use cooked glutinous rice flour since we will not cook the mooncake further after molding. No one likes to eat raw flour.
Put the glutinous rice flour in a pan. Heat the flour over low to medium heat and stir it continuously. The flour is cooked when it starts to smoke, and the color turns slightly yellow. Remove and let it cools before using it to dust the mooncakes.
4. Wrap the custard with the pastry
- Weigh equal portions of the dough and the filling with a kitchen scale. The mold I use is for 50g mooncakes, and hence I am using 25g of pastry and 25g of custard.
- Place the dough on a piece of cling film. Cover with another cling film and roll it into a circle with the rolling pin. You can also shape it with your hand (use gloves always as it is sticky) if you are good at it.
- Remove the cling film that covers the pastry. Place the custard filling on the pastry.
- Wrap the custard with the pastry. Make sure all the custard is covered by the dough This dough is like plasticine, very soft and elastic. You can press, push, and pinch it carefully to seal up the pastry.
- Roll the dough with your palms to form a round and smooth ball.
- Dust the surface generously with the cooked glutinous rice flour. The flour will prevent the dough from sticking to the mold.
- Shake off any excess flour. Otherwise, there will be too much flour, which results in white patches on the surface.
- Put the dough on baking paper. Place the mold on top of the dough and plunge the piston a few times. Remove the mold carefully.
- Place the mooncake in a container and cover to prevent it from drying out. Chill the snow skin mooncakes until the mooncake becomes firm before serving.
Snow Skin Mooncake with Custard Filling
Snow skin mooncake 冰皮月饼 is the new style of mooncake which has become a favorite dessert served during the Mid-Autumn festival. It has a chewy and soft pastry with various filling. Best to serve chilled
Ingredients
For the skin:
- Glutinous rice flour 80g
- Rice flour 80g
- Icing sugar 65g
- Wheat starch 40g
- Milk 300ml (Please refer to the note section for detail)
- Vegetable oil 40ml
For the custard:
- 130g unsalted butter
- 150g icing sugar
- 5 large eggs
- 100g milk powder
- 50g wheat starch
- Other:
- Additional wheat flour to dust the pastry
Instructions
Make the pastry
- Combine the icing sugar, glutinous rice flour, rice flour, wheat starch, and vegetable oil into a stainless steel bowl.
- Divide the above into four equal portions. Add 75ml of milk to each portion to form a batter. (Please refer to the note section below)
- Steam the batter over medium heat for twenty minutes or until the flour is fully cooked. Remove.
- Knead it manually for a minute or until it is smooth and shining.
- Chill it for thirty minutes.
Make the custard filling
- Cream the butter and sugar until light and fluffy.
- Add the egg to the mixture and continue mixing.
- Add the milk powder and wheat starch and mix until homogenous.
- Steam the custard for five minutes. Scrape the bowl with a metal fork to ensure even cooking.
- Steam further until the custard is thick enough resembles the plasticine.
- Chill it for thirty minutes.
Cook the glutinous rice flour
- Heat the flour over low to medium heat until it starts to smoke, and the color turns slightly yellow.
Wrap the custard with the pastry
- Weigh equal portions of the dough (25g) and the filling (25g) with a kitchen scale.
- Roll out the dough. Wrap the custard with the pastry.
- Dust the surface generously with the cooked glutinous rice flour.
- Put the dough on baking paper. Place the mold on top of the dough to form the mooncake. Serve chilled.
Notes
How to make the snow skin with different colors
After you have divided the mixture of flour, sugar, starch, and oil into four equal portions, do the followings:
- White skin: Add the regular milk. (75ml)
- Pink skin: Substitute the milk above with strawberry flavored milk. (75ml)
- Chocolate skin. Use regular milk (75ml), and add some cocoa powder or chocolate powder.
- Green skin. Blend some pandan (screwpine) leaves with the milk (75ml), let it pass through a strainer to remove the leaves and add to the flour mixture.
Recommended Products
As an Amazon Associate and member of other affiliate programs, I earn from qualifying purchases.
Nutrition Information:
Yield: 20 Serving Size: 1Amount Per Serving: Calories: 231Total Fat: 10gSaturated Fat: 4gTrans Fat: 0gUnsaturated Fat: 5gCholesterol: 64mgSodium: 43mgCarbohydrates: 31gFiber: 1gSugar: 11gProtein: 5g
The data was provided and calculated by Nutritionix on 7/28/2019

Mooncake recipe - How to make Chinese mooncake (Quick and easy)
Sunday 21st of September 2025
[…] other variation is called Snow Skin Mooncakes, in which the process does not involve baking at all. It is entirely a different mooncake recipe, […]
CC
Friday 24th of September 2021
Hi What can I use in place of milk powder? The shops didn't have any! Thanks
KP Kwan
Saturday 25th of September 2021
Try using 100ml of milk instead and a tbsp extra wheat starch/cornstarch to thicken it. I never tried that as milk powder is readily available at the baby section of the store where I live, but I hope it worked out well.
Emily
Friday 13th of August 2021
Hi! Any substitute for milk? Can coconut cream be used?
KP Kwan
Saturday 14th of August 2021
I would prefer to use almond milk if you are allergic to dairy products. You can use coconut cream, but its flavor may affect the overall result.
Caroline
Tuesday 23rd of February 2021
Hello! I’m gonna try this recipe. Would like to check, if I can replace glutinous rice flour with store bought cooked glutinous rice flour?
KP Kwan
Tuesday 23rd of February 2021
Should be OK to use the cooked flour.
Chia Nguek Kim
Saturday 14th of November 2020
This is such a good snow skin recipe ! Soft but doable . We think it's the best one so far . I tried the pandan dough n it smells so good. So I'm going to try the pink one with the strawberry milk. Thank you so much for sharing your fantastic recipe .
KP Kwan
Sunday 15th of November 2020
Thank you, and it is my pleasure to share :)