Looking for great food but do not want to spend too much time to cook? We have the chicken katsu recipe for you.
This chicken katsu recipe has an incredibly crispy outer layer of breadcrumbs, with the moist and juicy chicken breast meat inside.
The best part, it takes less than thirty minutes from preparation to serving.
All you need is the chicken breast, plus a few common ingredients available in any average home kitchen.
Sounds great?
Before you start to cook, read the result of a few tests I have done to derive the best possible chicken katsu (in my opinion). Also, read the tips I listed after the recipe. (very important).

How to prepare the best chicken katsu
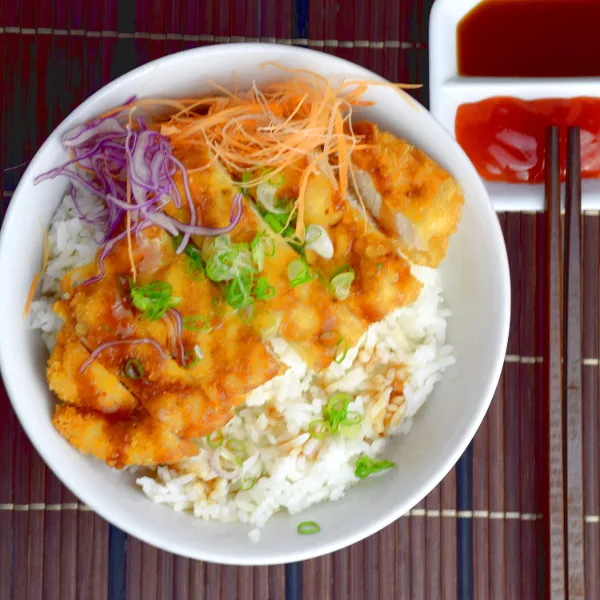
Chicken katsu (Japanese chicken schnitzel or chicken cutlet) is usually served with the sweet and savory tonkatsu sauce, finely shredded cabbage and cucumbers. You can eat it either with steamed rice, ramen or prepared chicken katsu don.
It is a comfort food widely popular in Japan. It is straightforward to prepare, and the main ingredients are common to most palates.
However, preparing chicken katsu is like cooking pasta. You need to master a few basic techniques to get the perfect golden brown, crispy, not too oily, tender and juicy chicken katsu.
The problem is everyone has their recipe and reasons behind, and some are quite contradictory.
So I have set out to test a few techniques to find out what is the best way to prepare chicken katsu.
Read on to understand the most important technique to master.
Note: This post may contain affiliate links. Please read my disclosure for more into. I may receive commissions for purchases made through links in this post.
1. Coat the chicken breast with the standard breading technique
I have read about two different approaches.
The first approach suggests using the standard breading method. Dredge the chicken breast in flour, shake off the excess and then dip into the egg bath. Then coat with breadcrumbs.
The rationale of coating with flour is to lay a foundation on the surface of the meat, much light putting a primer coat of paint. This layer of flour helps to seal up the breast meat, thus protect it from the hot oil in case part of the breadcrumbs fall off from the surface. If there is no such primer coating, any breakage of the breadcrumbs layer will expose the meat and turn the surface to a darker color. Dredge the meat in flour first will thus result in a more uniform browning.
The other theory is that the flour coating is redundant. The egg bath will stick to the meat anyhow, regardless whether there is a flour coating beneath. The egg will hold the breadcrumbs in place.
The result
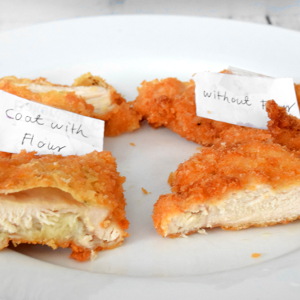
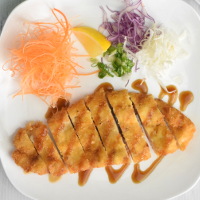
Let’s look at the image in this section.
On the left is the chicken katsu coated with flour, then egg liquid and finally breadcrumbs. On the right is with egg liquid and breadcrumbs only.
The difference is not drastic, but the one with flour coat does have a more uniform browning.
Another difference is the texture of the meat. The one that is coated with flour is marginally more tender and juicy, perhaps it is due to the additional barrier preventing direct heat from the oil reaching the meat. Flour also forms a primary coating, and avoiding any bald patches in contact directly with the hot oil, causing it to become stringy and dry.
2. Season the breast meat with salt and pepper (and skip the brine)
Brine the chicken breast can add moisture to the meat.
Chicken thigh is not suitable for making katsu although it is more tender and juicy. The shape of thigh meat is irregular and hard to make it into a flat piece. The thickness of chicken breast is more uniform and suitable for making chicken katsu.
But chicken breast has a problem.
It is challenging to make chicken breast moist and tender.
I read about brining the chicken can produce moist and juicy chicken katsu. So I have compared the result of two chicken katsu. One is seasoned with salt and pepper, and the other one brine with salt and sugar.
The brine consists of one liter of water, 40g of salt and 40g of sugar. I dissolve the sugar and salt in the water, then let the chicken cutlet submerge in the brine for three hours.
The result?
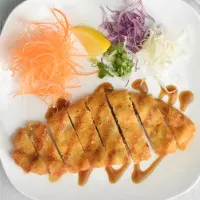
Let’s look at the image in this section.
There is no significant difference in their appearance.
Then the taste.
Surprisingly, the one that without brining is just as juicy as the brined chicken breast.
I do not have any scientific explanation for this. I just hypothesized that that flour, egg liquid and breadcrumbs form an effective barrier to the heat from reaching the chicken. So even though I fried the chicken at 350°F/175°C., the internal temperature of the breast meat may just reach 70°C/158°F when the chicken meat is cooked, even though the surface has turned to golden brown.
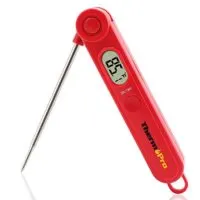
I tried to measure the internal temperature with a kitchen thermometer. However, the chicken katsu is too thin to get a consistent measurement.
My verdict: Season the chicken breast with salt and pepper, and skip the brine.

3. Fried at the right temperature

Several recipes recommend the frying temperature for chicken katsu should be anything between 300°F/150°C and 350°F/175°C.
I deep fried two pieces of chicken katsu, one at 300°F/150°C and the other one at 375°F/190°C to find out whether there is any different.
Since the one that cooked at a higher temperature became golden brown faster, the time required was slightly shorter than the other one. The endpoint is when the chicken katsu turned golden brown. I try not to overcook them to maintain the juiciness.
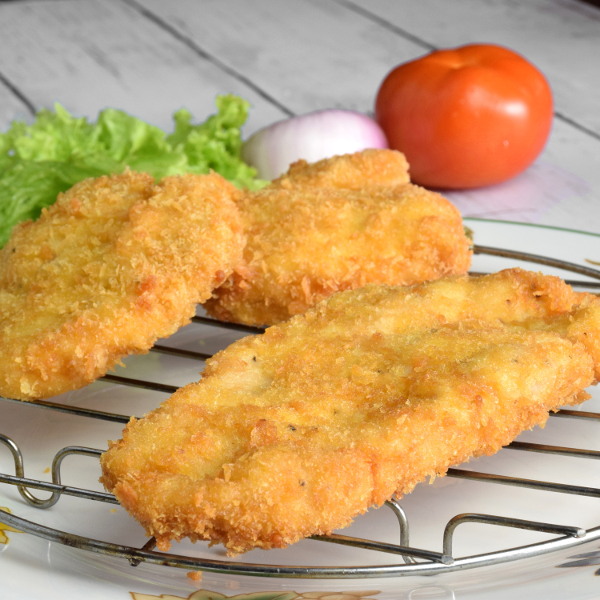
Let’s look at the image in this section.
You should notice that the one that is cooked at 300°F/150°C has a more uniform browning surface, whereas the one at the higher temperature has some dark specks. However, there is a small part of the outer crust detached from the chicken for the one with lower temperature. The detachment is likely as the result of low temperature.
After several attempts, I finally found the sweet spot that produces the uniform color, and the crust is fully intact. The answer: 350°F/175°C.
4. Rest the breaded chicken before frying
I came across the instruction of one recipe to rest the breaded chicken for four hours in the refrigerator before deep-frying.
The recipe does not mention the reasons and benefit of this step. So I have decided to find out whether there is any difference between the freshly breaded chicken versus the four hours delayed one.
I make two chicken katsu. One with four hours of resting time in the refrigerator and deep fried the other one immediately.
The result? It turned out there is no difference at all!
There is no harm to rest the chicken. It is actually good to prepare in advance so that you have more time to prepare other dishes when the time is insufficient. However, when you feel hungry, just cook it and don’t wait!
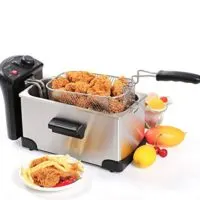
5. Deep fryer versus skillet- which is better?
There are a few recipes mentioned that it is more convenient to use a deep saucepan or skillet to prepare chicken katsu at home. This is the assumption that many home kitchens do not equip with an electric deep fryer.
I prepared the chicken katsu with a deep frying pan, filled with 1cm deep of oil and compare with the other one cooking in the electric deep fryer. Since I prepare both cutlets at the same time, I can assume that all variables are constant except the equipment.
Here are the differences based on my observation:
- The temperature is easier to control with the electric deep fryer. You just need to set it to the desired temperature to cook. As for the deep saucepan or skillet, you need to make a guess of the actual temperature. Therefore, it may not be able to cook at the exact temperature as I suggest in the previous section.
- Since the chicken cutlet is suspended in the metal basket of the electric deep fryer, you will expect even browning of the chicken. As for the saucepan, the bottom of the chicken that in contact with the saucepan tends to pick up the debris of breadcrumbs in the oil. As a result, it prone to form dark specks on the surface. In order to minimize this imperfection, you need to use fresh oil each time you cook the next batch of chicken, filter it with a wire mesh before frying the next batch of chicken.
- You may need to flip and check the color of the chicken cutlets more often if you use the saucepan to ensure that the chicken is cooked to the right doneness. As for the electric deep fryer, there is no need to flip over as the chicken is suspended in the oil.

Four most important points you need to know to get the best result
Here is a summary of what I have found out how to prepare the best chicken katsu.
1. Pound the chicken breast. (Make sure it has a uniform thickness.)
2. Coat the chicken breast with flour, egg liquid, and breadcrumbs. (Use the standard breading technique)
3. Season the meat with salt and pepper. (Forget about the brine.)
4. Deep-fried at the right temperature. (350°F/175°C)
Chicken katsu recipe
This is a well-tested chicken katsu recipe. Simple yet delicious.
Ingredients
- 2 Chicken breasts, boneless, skinless, each about 250g
- 1 teaspoon of salt
- 1/8 teaspoon ground white pepper
- Sufficient flour to coat the chicken
- eggs
- Japanese breadcrumbs (Panko), coat the chicken
Instructions
- Remove the skin of the chicken breast.
- Cut each chicken breast half into two cutlets.
- Pound the chicken cutlets to about 1cm thick with a meat mallet.
- Season both sides of the chicken meat with salt and pepper.
- Dip the chicken meat into flour. Shake off the excess flour.
- Remove and transfer it into beaten eggs. Turn over the meat so that both sides are wet by the eggs.
- Lift and let the excess egg drip off.
- Dredge the chicken in breadcrumbs. Remove the excess. Lightly press the surface to help the breadcrumbs adhere to the surface.
- Deep fried the chicken in hot oil at 350°F/175°C for five minutes,
- Drain away the oil on the wire rack or paper towel lined tray.
Recommended Products
As an Amazon Associate and member of other affiliate programs, I earn from qualifying purchases.


Nutrition Information:
Yield:
4Serving Size:
4 servingsAmount Per Serving: Calories: 356Total Fat: 10gSaturated Fat: 3gTrans Fat: 0gUnsaturated Fat: 6gCholesterol: 140mgSodium: 675mgCarbohydrates: 29gFiber: 1gSugar: 1gProtein: 35g
This data was provided and calculated by Nutritionix on 5/26/2019
9 Tips to prepare the best chicken katsu
Read the following tips before you print the recipe. There are many useful points and lengthy explanation here which I do not include in the recipe.
- The best thickness of chicken breast is 1 cm. The thickness should be uniform across the whole pieces of the meat. To achieve this, you need to trim off the excess meat of the breast if is too thick. Half the chicken breast horizontally to become two cutlets. The trim-off pieces can be used to prepare minced meat or dishes that required small pieces of meat.
- I do not mention the amount of salt in this recipe since it depends on the weight of the chicken pieces. I use 1g of salt for every 100g of chicken. For example, if the chicken meat is 150g, then I’ll add 1.5g of salt to it, which is about a quarter teaspoon. (One teaspoon is 1.25g.)
- The classic breading technique works best for chicken katsu. Dredge the chicken in flour, then dip in the beaten eggs, and lastly coat with breadcrumbs.
- Use a meat mallet to pound the chicken cutlets into one cm thick. Even thickness will assure you to get uniform browning. If you do not have a meat mallet, you can use a rolling pin or the back of the knife the pound it. Place a plastic sheet on the cutlets before pounding it helps to prevent the meat from sticking to the mallet/rolling pin/knife. Be sure to pound it just enough until it forms a uniform piece. The excessive pounding will cause the cutlet to break up.
- During deep-frying, gently lower one-third of the chicken into the hot oil and hold it for a few seconds. After that, laying down the chicken cutlet away from you to avoid the oil splashing towards you.
- The ideal temperature to fry chicken katsu is 350°F/175°C. You can use a kitchen thermometer to check the temperature. Alternatively, set the electric deep fryer to the desired temperature. If you do not have the kitchen thermometer or electric deep fryer, adjust the heat until the chicken is cooked vigorously in bubbled oil. The temperature should be around 350°F/175°C at this point.
- The breadcrumbs leaving in the hot oil will get burnt and adhere to the surface of the next batch of chicken katsu. Pick up the breadcrumbs in the oil in between deep-frying different beaches to prevent this from happening.
- Chicken breast meat will cook at 165°F/75°C. You can use a kitchen thermometer to check the temperature. However, since the chicken katsu is thin, it is hardly able to get the correct measurement of the internal temperature. Another way is to use visual observation. The chicken is cooked when you feel there is a moderate vibration of the chicken when you pick it up with a pair of chopsticks. The meat is also floating on the surface of the oil when it is cooked.
- If you intend to cook a few batches of chicken katsu, you can store the first batch in the oven at 200°F/93°C.
Robert
Thursday 26th of August 2021
I pound the chicken breast BEFORE cutting into slices. The instructions say cut, then pound.
Brontie
Friday 4th of October 2019
Paul, If you aren’t getting a sufficient lemon flavor, add finely chopped/minced lemon peel to the flour or panko. Don’t use the white membrane of the lemon since it is bitter. If you’re still not getting enough, add some citric acid in addition to/instead of the peel to dial it up further. Citric acid should be found among spices and bulk items. -Brontie
KP Kwan
Friday 4th of October 2019
Hi Brontie, Thank you for sharing your expertise. KP Kwan
Easy pork chop recipe - How to make in 3 steps (Hainanese style)
Friday 21st of December 2018
[…] If you like deep-fried meat/chicken coated with a sauce similar to the Hainanese pork chops, here are the links to the recipes that you might interested: Chicken karaage- Japanese fried chicken Chicken katsu recipe- How to make the best Japanese fried chicken […]
Paul
Saturday 18th of August 2018
Hi KP Super highly professional description. Woah...shud be paid for that:)) My method is a bit different. * Chicken cutltets in toaster oven @ 180C. (After cleaning /washing with salt to remove odours and slime....especially ith pork and prawns) **Add a small container of water in oven. Spray a small pinch of MSG on chicken. (MSG is a miracle taste enhancer...has a huge impact on recipe.....It got its bad reputation - like fat - bc ignorant people added huge quantity to their food.) ***Remove chicken after 6 mins (varies with thickness). **** Place cutlets in the egg bath then cover them with crumps. ****Finally shallow fry on top at hi temp. for 1 min each side.
One chicken I cannot do is 'lemon chicken'....:( I followed your recipe but cannot have the lemon taste on biting the chicken. Lots of recipes "Lemon Chicken"....none gives lemon flavour. Many thanks for sharing....Now I will try your Kuay Teow (using soya sauce manis :)
KP Kwan
Saturday 18th of August 2018
Hi Paul. Thanks for your comments and your sharing of your method. I shall try yours one day. Regards, KP Kwan
PIYALI
Sunday 5th of August 2018
Dear KP Kwan, I was fascinated by the amount of trouble you have taken to help your readers to end up with a fantastic outcome. Thank you so much for giving so much time n effort. In India it’s hard to get the accompaniments / sauces you have mentioned. Shall try out with easily available Sriracha or Spicy Mayo.
KP Kwan
Sunday 5th of August 2018
Hi Piyali I would prefer you use any Mayo rather than Sriracha. But why not make it a little spicy? You will get a chicken katsu with a bit of Indian flavor. That is how we modify a recipe and inject some local flavor to create a fantastic meal. Cheers. KP Kwan