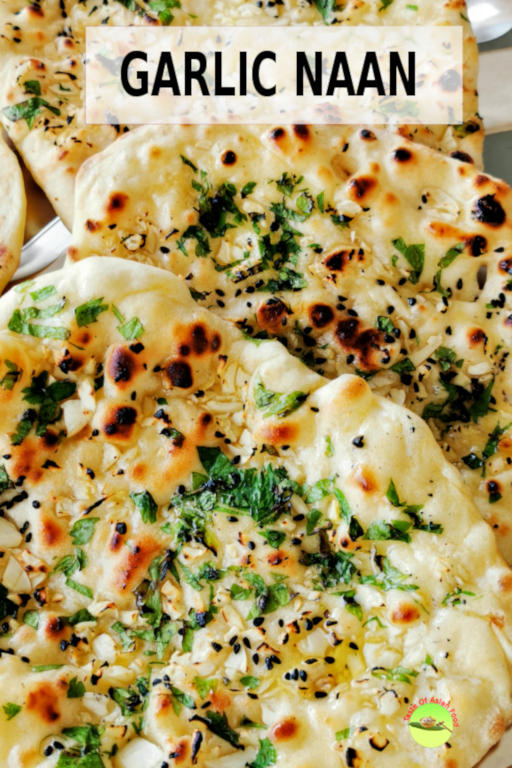
This article is about making garlic naan, the Indian flatbread baked in a large clay oven called tandoor. This is a garlic naan recipe without yeast as it is quicker and easy to prepare than using yeast. These additional ingredients elevate an ordinary flatbread to the next level and taste so good that you don’t even need to serve it with curries.

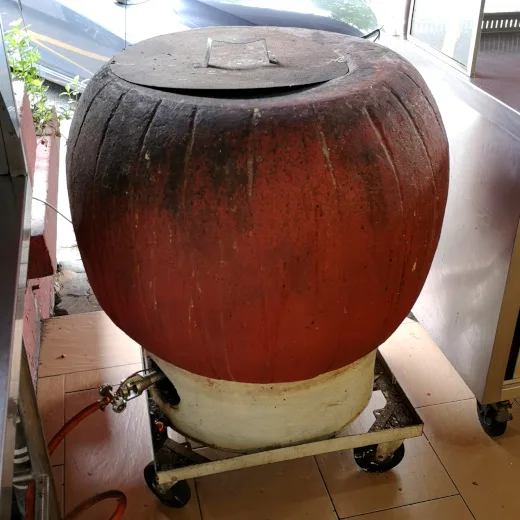
How to make naan with the tandoor
It is entertaining to watch how the master makes garlic naan. He flips and swings the dough by throwing it between their palms and finally lands perfectly on the naan pillow. Then he will hold the naan pillow and slam the dough against the inner wall of the tandoor. The heat from the tandoor’s wall will puff up the naan, and the chamber’s heat generated by the wood fire will quickly brown and crisp up the large blisters.
He will remove the naan with a unique pair of naan scrapers and hooks.
Note: This post may contain affiliate links. Please read my privacy policy for more info. I may receive commissions for purchases made through links in this post. As an Amazon Associate, I earn from qualifying purchases.
The garlic naan recipe without yeast
This garlic naan recipe without yeast does not require the clay oven (tandoor). There is a way to replicate the process with only a gas stove and a cast iron tawa or pan at home.
Below is a detailed explanation of how to make naan at home. I will make my favorite garlic naan, but it applies to all the variations of naans.
If you are craving to relish this garlic naan at home, keep reading. These soft, pillowy flatbreads are easier to make than you think.
Ingredients for garlic naan recipe without yeast
Ingredients for making the naan dough:
Most of my naans are made with all-purpose flour, but whole wheat flour, bread flour, or a blend are also suitable. However, naan prepared with whole wheat flour will not be as soft as those made with all-purpose flour.
Yeast and baking soda. You need a leavening agent to make the naan soft and fluffy. Naan is traditionally made with yeast. Nowadays, many people prefer using baking soda to simplify the process. The amount I use of either yeast or baking soda is 1g for every 100g of flour. I choose to use baking soda because I am writing a quick naan recipe.
Yogurt is the ingredient that makes the flavor of naan so distinctive. I use one part of yogurt for four parts of flour to get the optimum taste for my naans. You can use either plain or Greek yogurt.
Milk helps to make the naan soft and fluffy. I do not use milk in this garlic naan recipe without yeast because I want to write an easy naan recipe. You can replace part of the water in the recipe with milk to make naans with a richer flavor.
Although eggs are used in many bread recipes, they are mostly not included in the naan recipes because many Indians are vegan. So, by default, most of the naan recipes are without eggs.
Oil. You may use any vegetable oil, but ghee & butter are my choices. Substitute it with olive oil if you want to make vegan naan. A teaspoon of oil for every 100g of flour should be enough.
Salt is optional because naan is often eaten together with curries. However, sometimes you want to eat them alone, so adding a pinch of salt is OK.
Sugar may not be necessary, but a small amount will make it tastier.
Water. I use 25g of yogurt and 40g (or ml) of water for every 100g of all-purpose flour in this garlic naan recipe without yeast. The amount of liquid (water + yogurt) should be 65g for every 100g flour. This measurement serves only as a guideline because the amount of water may differ slightly for different types of flour.
Ingredients for the topping for garlic naan
Chopped garlic and coriander leaves are the main ingredients of the topping.
Apply some melted butter to the garlic naan while it is still warm.
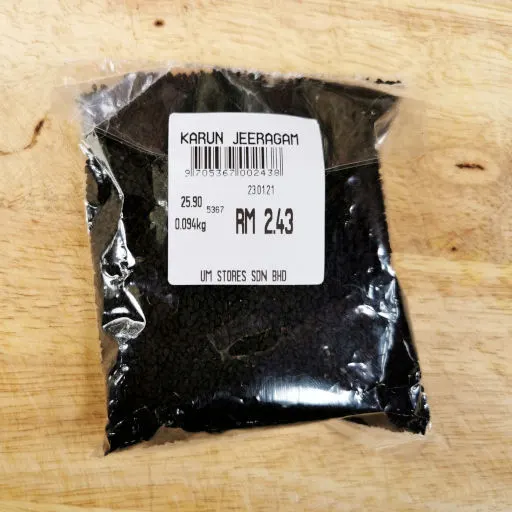
Kalonji seeds add flavor and improve the appearance of the garlic naan. However, kalonji seeds are optional as they may be hard to get in certain places. It has different names in English- Nigella seeds, black seeds, and black cumin, to name a few. You can read here for more information.

Garlic naan recipe without yeast – Step-by-step guide
The dough of garlic naan is the same as any other naan variants, so you can use the plain naan dough to make butter naan, paneer naan, and others.
1. Making the naan dough
The method is similar to other flatbreads such as pita bread. Here are the steps.
Combine the ingredients
- Measure and combine the all-purpose flour, salt, and sugar in a large mixing bowl.
- Make a small hole at the center of the dry ingredients and add the yogurt.
- Add the baking soda to the yogurt and gently mix them. The acid in the yogurt will make the baking soda active.
- Then add the oil and combine all the ingredients with a fork or spatula.
- Measure the amount of water accurately, then pour it into the bowl.
- Combine all the ingredients by stirring in one direction. Eventually, it will clump together and pulls away from the bowl.
Knead the dough
- Transfer the dough to a flat surface and start kneading it. The dough is quite sticky initially, so you might need to add a small amount of flour to prevent it from sticking to the work surface and your hands.
- After kneading it for a few minutes, the dough will become less sticky. Keep kneading the soft dough until it becomes a dough ball that is elastic, no longer sticky, and the surface becomes shiny and smooth. This process will generally take between 7 to 10 minutes.
- Apply oil to the dough’s surface to prevent it from drying.
- Place the dough balls in an oiled container. The resting time is at least an hour or until the dough is fully relaxed. It can be stretched to paper-thin easily and will not shrink back.
Making naan dough with yeast (if you prefer)
The method differs slightly from the above because we must dissolve the yeast first.
- Prepare and mix the dry ingredients, yogurt, and oil for the baking soda method.
- Measure the amount of water required accurately.
- Sprinkle the active dry yeast into the water. Let the yeast dissolve by itself. The yeast should fully dissolve after five minutes. If it’s not fully dissolved, give it a mix.
- Pour the yeast mixture into the dry ingredients, yogurt, and oil, and follow the remaining steps in the last section.
2. Resting and proofing
The dough will become more stretchable and soft after resting.
While resting, the dough with yeast will expand and swell to nearly twice the original size. It will take an hour at room temperature for the yeast formula. If you use the garlic naan recipe without yeast, the dough without yeast will not expand, but it will become highly stretchable and soft after an hour.
- After the size has doubled, punch down the dough to release all the air trapped inside. (of course, this step is only for the dough with yeast).
- Place the dough on a floured surface, and divide it into portions between 80g to 100 g each. This amount is enough to make the size of naan typically served in restaurants.
- After that, shape each portion into a ball.
- If you want to continue later, apply oil to the surface to prevent the dough balls from sticking together. Place them in a container and cover them. If you want to cook it immediately, continue the steps in the following sections.

3. Roll out the dough and apply the garlic topping
The dough can only be rolled out once it is rested and fully relaxed. Otherwise, it will shrink back after each stroke.
Here are the steps:
- Place a portion of the dough on the work surface. It is sticky, and you must flour the work surface and sprinkle some on the dough to prevent it from sticking. Another way to present sticking is to apply some oil to the surface of the dough.
- Flatten and push the dough outwards with your finger, either into a circle or an oval. I prefer an oval shape by merely rolling it with the rolling pin back and forth. The ideal thickness is about 1/4 inch. If the dough is fully relaxed, it is easy to shape with your fingers without using the rolling pin.
Add the topping to become garlic naan
- Sprinkle some chopped garlic and chopped coriander leaves on the surface. If you have kalonji seeds, sprinkle a tiny amount on them. An alternative is to add some sesame seeds if kalonji is unavailable.
- Press the surface lightly with your hand or rolling pin to ensure they stick firmly onto the dough. This step prevents the topping from falling off when you overturn the pan on the stovetop in the following steps.
- Flip it over and apply some water on the other side.
Note: You can substitute the garlic with other ingredients. Cheese naan is a popular variation. Alternatively, add some butter to make garlic butter naan.
How to cook naan at home (without the tandoor oven)
The flipping skill of professional naan bakers is too complicated for most of us. Even if we master the skill, it is almost unimaginable to purchase a tandoor just for making naan at home. Here is the easiest way to approximate how naan is made in the restaurant to address this problem.
The flipping part can be replaced by using a rolling pin. That’s easy.
The challenging part is how to bake the naan like what is happening in the tandoor’s chamber. The tandoor’s scorching surface cooks the bottom of the naan, and the top is heated and browned by the dry heat in the chamber.
Luckily there is a simple way to do this in any kitchen. All you need is a non-stick pan, preferably a cast iron skillet or tawa, and a gas stove. I will explain how to do it in the following section.

4. Cook the naan on the pan or tawa
- Gently remove the dough with a dough cutter and put it on a heated pan (or tawa), wet side down. The naan will automatically stick to it in the presence of water.
- Adjust the flame to medium-high heat and let the naan cook on it undisturbed until large blisters start forming on the surface. The heat will cause the dough to rise and forms air pockets.
- Once this happens, turn the pan upside down between four to six inches above the flame. Move the pan slowly so the surface will be cooked evenly by the stove’s heat, just like in the tandoor’s chamber.
- Do this step until it starts to develop charred marks on the brown blisters.
- Once the charred marks have developed, put the pan on the stove and cook for a few more seconds if you want it to become more crispy.
- Transfer the naan to the plate and brush butter over it while it is hot.
Note: Roll it out slightly thicker if you like a more fluffy naan. Make sure you have a good source of heat and cook it a little longer, or you will end up having some uncooked naans,
Why is a stove with a pan work?
Is using a pan and a gas stove a compromised method?
In a way, yes, but it does not make sense to get a tandoor just for making some naans. However, this is the closest technique to simulate what happens in the tandoor’s chamber.
Here are the reasons why it works.
- Once the cast iron pan is hot, it can hold the heat for a long time. Therefore, it is ideal to use it as the surface to cook the naan, like what happens in the tandoor.
- To simulate what is happening in the tandoor’s chamber, we need to stick the naan dough to the pan and overturn it so that the stove’s heat will cook the top of the naan. When water is applied to the dough’s surface, it will be stuck on the cast iron, just like in the tandoor. I have a nonstick tawa, which I use to make chapati, but the naan will slip off the surface even after applying plenty of water.
What if you don’t have a cast-iron pan? No problem. You can use any frying pan as long as it is not a nonstick pan. The dough will still stick onto the pan, although the heat may not be as distributed as the cast iron pan.
How to store the raw dough
If you are not cooking the naan immediately, you can cover the raw dough with plastic sheets and keep it in an airtight container. It can be stored in the refrigerator for up to two days. When you need to use them, roll them out as usual.
The topping for the garlic naan should be added right before cooking. Store the raw naan dough without any topping.
How to reheat naan
You can reheat garlic naan in the oven at 200°C/400°F for 2 to 3 minutes. Alternatively, please place it in a cast iron pan and heat each side for a minute to make it hot and crispy again.
How to serve garlic naan
Plain naan is seldom served on its own, but the garlic naan is full of garlic and butter flavor that you can eat alone. Here is a list of Indian dishes that are commonly served with naan.
Tandoori chicken. As the name implies, this chicken is baked in the tandoor! However, I also have a recipe that you can make in the oven. Check out this oven-baked tandoori chicken recipe.
Chicken curry. This easy chicken curry recipe is my favorite curry for serving with naan. There is plenty of gravy that you can mop up with the naan. This dal recipe is perfect for vegetarians. Tadka is the tempering method to bring out the aroma and flavor, making it incredibly addictive and tasty.
Chicken tikka masala. This dish is not from India, although some people said otherwise. Chicken tikka masala is an Anglo-Indian cuisine that has been the staple of the British. It takes the classic chicken tikka to the next level with a dash of British coolness.


Garlic Naan - How to make it at home
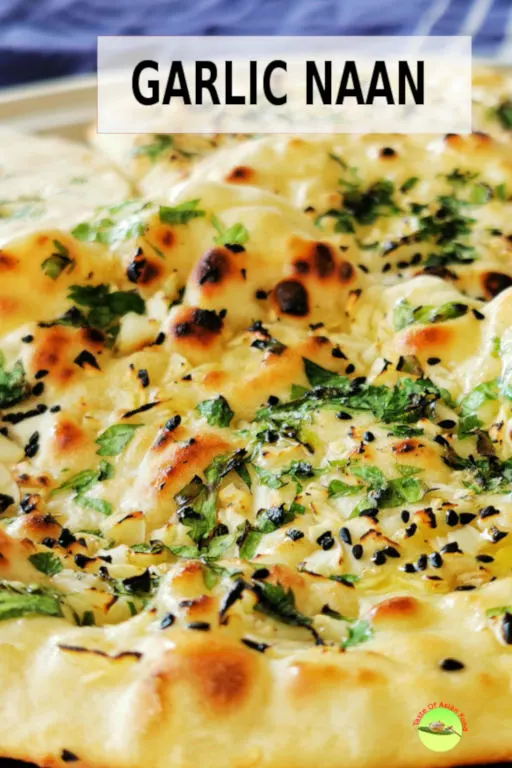
Garlic naan is the Indian flatbread flavored with chopped garlic, coriander leaves, and kalonji seeds and brush with melted butter. These additional ingredients elevate an ordinary flatbread to the next level and taste so good that you don’t even need to serve with curries.
Ingredients
Ingredients A (dough)
- 200g (2.2 cups) all-purpose flour
- 1/4 tsp salt
- 1 tsp castor sugar
- 50g (3.2 tbsps) plain yogurt
- 1/2 tsp baking soda
- 2 tsp vegetable oil
- 80 ml (1/3 cup) of warm water
Ingredients B (topping)
- 1.5 tbsp chopped garlic
- 2 tbsp chopped coriander leaves
- 1tsp kalonji seeds
- 1 tbsp butter, melted
Instructions
- Combine the all-purpose flour, salt, and sugar.
- Make a small hole at the center and add the yogurt.
- Add the baking soda to the yogurt and gently mix them.
Then add the oil and start combining all the ingredients. - Add water and combine all the ingredients.
- Kneading the dough until it becomes elastic, no longer sticky, and the surface becomes shiny and smooth. (about 7 to 10 minutes).
- Apply some oil to the dough. Cover and let it rest for 2 hours.
- Divide it into four portions and shape each portion into a ball.
- Flatten the dough with your finger either into a circle or an oval, about 1/4 inch thick.
- Sprinkle some chopped garlic, chopped coriander leaves, and kalonji seeds on the surface.
- Use a rolling pin to press the toppings so that it sticks firmly onto the dough. Flip it over and apply some water on the other side.
- Place it on a heated pan (or tawa), wet side down.
- When blisters start forming on the surface, turn the pan upside down at about four to six inches above the flame.
- Do this step until charred marks are developed on the blisters and the surface is nicely browned.
- Transfer the naan to the plate and brush some butter over it while it is still hot.
Notes
For the naan made with yeast, substitute the baking soda with 1/2 tsp of yeast in the recipe.
Recommended Products
As an Amazon Associate and member of other affiliate programs, I earn from qualifying purchases.
-
 Rani Kalonji (Black Seed, Nigella Sativa, Black Cumin) Seeds 3.5oz (100g) All Natural ~ Gluten Free Ingredients | NON-GMO | Vegan | Indian Origin
 -

 Stainless Steel Mixing Bowls by Finedine (Set of 6) Polished Mirror Finish Nesting Bowl, ¾ - 1.5-3 - 4-5 - 8 Quart - Cooking Supplies
 -
 Rolling Pin & Silicon Pastry Mat,Silicone Large Pastry Mat With 19.6" x 15.7",Dough Roller Sleek and Sturdy 11.8" Perfect Match
 -
 Pre-Seasoned Cast Iron Skillet 2-Piece Set (10-Inch and 12-Inch) Oven Safe Cookware - 2 Heat-Resistant Holders - Indoor and Outdoor Use - Grill, Stovetop, Induction Safe
Nutrition Information:
Yield: 4 Serving Size: 1Amount Per Serving: Calories: 195Total Fat: 6gSaturated Fat: 2gTrans Fat: 0gUnsaturated Fat: 3gCholesterol: 10mgSodium: 546mgCarbohydrates: 29gFiber: 1gSugar: 4gProtein: 6g
This data was provided and calculated by Nutritionix on 1/28/2021
Vasu
Thursday 4th of February 2021
Hi. This is a nice recipe but its either naan or bread. Its not naan bread. Just like we don't say chai tea. Its either chai or tea.
KP Kwan
Thursday 4th of February 2021
Thank you for the information.
Tina O'Dowd
Thursday 28th of January 2021
Thankyou KPWan , I love a lot your recipe but I had tear tenders on my ‘s shoulde I cannot use by hand So can use eclectic & if use take how many minutes. ? Thankyou very much &. all the best to you & your family.
KP Kwan
Thursday 28th of January 2021
Hi Tina, I suggest you can use the electric mixer. Use the dough hook attached to the mixer and set it at low speed. I would suggest you take a visual inspection of the dough then set a fixed mixing duration. After a few minutes, check the dough if it has become smooth, shiny, pull away from the mixer bowl, then I should be OK. KP Kwan
KP Kwan
Wednesday 27th of January 2021
Hi, this is KP Kwan. I am happy to see you in this comment area, as you have read through my recipe. I am pleased to reply to any questions and comments as soon as possible.